Being the dyed in the wool Fun-gal that I am, it’s only natural that not only do I harvest and teach about wild mushrooms, but I spend a great deal of time lying on the forest floor grunting, groaning, cursing the bugs and photographing the marvelous mystical often elusive fungi.
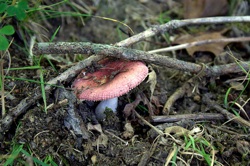 First you have to find the darn things – and picky little devils that fungi can be that’s half the battle. LOOK DOWN – LOOK UP- Look on the trees, on the logs, under things; you name it, and you are likely to find a fungus of some sort. The first day following a warm rainy spell is often a good time to be out in search of fungi. Most fungi like moderate temps and damp, low conditions. If there’s been a run of rainy days, I’ll often go out between showers to shoot – the colors are most vibrant immediately after a shower and when it’s still a bit cloudy and overcast.
Since most mushrooms grow up from under the ground, or under tree bark, they are often half covered in dirt, bits of vegetation and other distracting bits of messiness. While many like this natural look, I find it makes a much better image if I do a little housekeeping first. Brush off dirt, small twigs, any vegetation. As in any image scour the whole image in your viewfinder (or LCD) and remove any movable distracting objects in the foreground or background of your shots. Remember to be an environmentally friendly photographer and try to leave things as naturally as you found them, but don’t be afraid to do a little clean up and set up of the shot prior to shooting.
I always feel that a fungi image is best shot from a very low perspective – often lying flat on the forest floor. This will enable you to see the various textures, shapes and colors of not only the top/cap of the mushroom but also its underside. This is especially important when you are photographing images that will be used as mushroom identification aids. Those images should always include a view from above, below, the stem, and if there is more than one handy, I like to include on that I have picked and placed in the image after cutting it in half as an additional identification aid. Shooting from ground level also gives your mushroom height which makes for a more dramatic and three dimensional shot. Of course spending all that time lying around on the ground makes insect repellent and repellent treated clothes a must – a ThermaCell can be very handy thing to have when you are out searching for ‘shrooms in the warmer mosquito ridden months. Also remember the tick precautions – many a time I’ve gotten up from the forest floor to discover I have been invaded by an army of teeny tiny seed ticks and turkey mites.
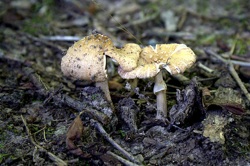 Get close … then even closer. A macro lens or a zoom lens with a macro setting that will allow you to get up close and personal with some of the tiniest of mushrooms is a must. If you prefer to use the macro setting on your camera, that’s great too. The small super zoom Canon Powershot SX20 that I carry in addition to my DSLR’s has a super macro setting that will focus darn near when the subject is touching the lens!
Get the light right!
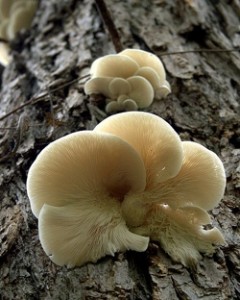
Probably one of the biggest trials (other than all that yoga style, stand on your head and spit nickels positioning to get in the right spot) when photographing fungi is lighting. Let’s face it – in general they prefer dark, dimly lit woodlands and forests. One of the most common challenges is that of adequately lighting the underside of the mushroom. The undersides, which always seem to have such interesting textures and patterns, will often be in what seems like utter darkness when compared with the cap and upper portions of the mushroom. Although lighting the undersides can be tricky, with a little work and trial and error, you’ll find that you can achieve some stunning images when you try out of the following techniques.
Fill Flash – Almost any digital camera these days is capable of using a flash to achieve a ‘fill flash‘effect. This does require a bit of experimentation and checking of the histogram. Sometimes I’ll have to adjust my flash what seems like an endless amount of times to get just the right balance and to avoid blowing out the highlight on the other portions of the mushroom. To be honest – (and too many other photographer’s consternation) – I rarely use a flash unless I absolutely have to. Slower shutter speed, wide open apertures, higher ISO’s, and a reflector of some kind are my friends in the forest.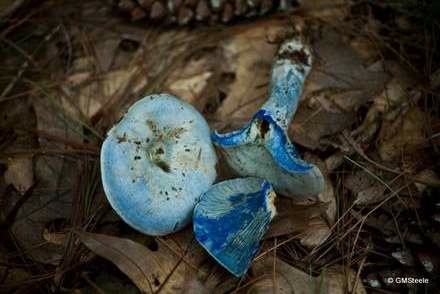
Get rid of the shake!
Due to the low light encountered in most places that you’ll find fungi you’ll often need to shoot with longer shutter speeds which mean the need to find a way to keep your camera perfectly still. Whether you elect to use one of the specialty tripods that allows you go very, very low; a bean bag stabilizer or my personal favorite – my rolled up jacket or outer shirt, or gear bag, often some type of stabilization is needed. I will set up the shot, then use the timer, the remote, or a shutter release cable to insure the least amount of photographer induced camera shake. Do not be afraid to go with a very slow shutter speed. The good part about shooting fungi is that they don’t move about – and with just some camera stabilization you can achieve good results.
Another method that I prefer is a wide open aperture – it shortens the depth of field, making the mushroom stand out perfectly against a buttery blurred background. Try shooting a few frames wide open, then back down a bit and get more of the surrounding area in focus. Showing a mushroom’s habitat clearly can often be an important aid when using the photos for identification purposes.
Don’t forget the greatest bonus of setting out in search of mushrooms to photograph; finding a nice “mess” to take home for supper! Happy ‘Shrooming! It will soon be time for those great summer boletes and chanterelles!
Gretchen Steele of Coulterville, Ill., owns and operates Steele Photo Services. Gretchen is a Southern Illinois native and has been traversing the wild spaces of Illinois since her childhood. She retired as Public
Health Nurse in 2003 to pursue her passion of outdoor and wildlife photography full time. Her award
winning work has been featured in many outdoor media outlets, and has been exhibited in various
venues across the nation. A lifetime of wild crafting and wild foraging has made Gretchen a well
respected authority on Illinois edible and medicinal wild plants and fungi.
Gretchen is a Pro Staff Member and Photographer for Southern Illinois Outdoors, Down River Outdoors,
Silver Creek Hunt Club, and Muddy River Shooting Preserve. She is a Featured Photographer with several
other outdoor media groups including Illinois Hunter, Prairie State Outdoors, and Illinois Outdoor News.
Gretchen also serves as a guide and speaker for various photography clubs and organizations wishing to
explore the world of outdoor and nature photography. She host several outdoor photography tours
each year and biannual outdoor photography workshops. Additionally Gretchen serves as a speaker
throughout Southern Illinois as an advocate for women in the outdoors, the benefits of outdoor time,
and various hunting, fishing, and outdoor sports.
In addition to serving as contributing writer and photographer in the print market Gretchen authors two
outdoor related blogs : http://siloforests.blogspot.com/ ‐ In the Forests and The Fields and
http://www.prairiestateoutdoors.com/index.php?/gretchens/ ‐ Through the Lens
I had no idea that fungi/mushrooms could be so PRETTY! Seriously some of them are beautiful, especially the blue ones! As a kid in Michigan I often came across fungi but was told they were always poisonous so of course I stayed away and kept my horse away as well. I need to go do the “fungi” thing with you some time! Great article…thank you!
Thank YOU! Anytime we can go a shroom safari I’m up for it! Looking forward to when I can finally meet you in person 🙂