Low-Light Situations: Helpful Tips and Tools
Imagine for a moment that you’re sound asleep in your bed. Suddenly, you hear a loud crash from somewhere in another room. You jump out of bed, grab your firearm from your nightstand, and go to investigate the source of the noise. It could’ve just been the cat knocking something off the counter, but what if it wasn’t? How do you search for the cause of the noise in the low-light or darkness of your house while remaining hidden from a potential threat? If there is someone inside your home, how do you verify that it is indeed a threat and not a family member?

Armed and In Charge is sponsored by LaserMax
Here is where low-light shooting drills can be beneficial. Police officers train on these types of drills due to the nature of their job and having to handle calls at all times of the day. But what about the average gun owner? Should we assume that we will respond to a situation at night the same as we would during the day?

The red glow of the laser can be seen on the targets
Darkness Affects Our Eyesight
According to nursingschools.net, our eyes help us gather about 85 percent of the information about our surroundings. Simply put, they’re responsible for setting up how we react to the environment in which we live. Under stress, a person will respond the way they have been taught to respond. In low-light conditions, our sense of sight is diminished greatly and it can take several minutes for our eyes to adjust enough to be able to see some of the things around us.
Stacy demonstrates the Surefire flashlight hold.
Training
By understanding how much we rely on our sense of sight for information analysis, we can train to adjust and compensate for reduced vision in low-light situations. Here are some drills that I recently taught a group of ladies.
- Load your magazine without the use of light, by feel only. Hopefully you carry a firearm or have a home defense gun that’s already loaded. Even so, I still believe that this drill is important to practice, in case the need to reload in the dark should arise. It’s also important to be able to clear a malfunction without seeing the problem.
- Learn various ways to hold a flashlight. Some techniques are:
- FBI—Hold the flashlight away from your body, out to the side and up in your non-shooting hand as you search for and engage targets. This was developed to protect the agents from incoming bullets directed at the light.
- Neck—Pull your non-shooting hand, which holds the flashlight, up to your chin with the bright end pointing toward the threat. With the light indexed at your neck, it’s similar to your support hand being at the center of your body, as it’s supposed to be during normal weapon presentation.
- Harries—To employ, slip your non-shooting hand, which is holding the flashlight, under your shooting arm and then lower the elbow of your non-shooting hand by rotating your non-shooting arm at the shoulder. This applies pressure against the back of your shooting hand and provides a relatively stable shooting platform.
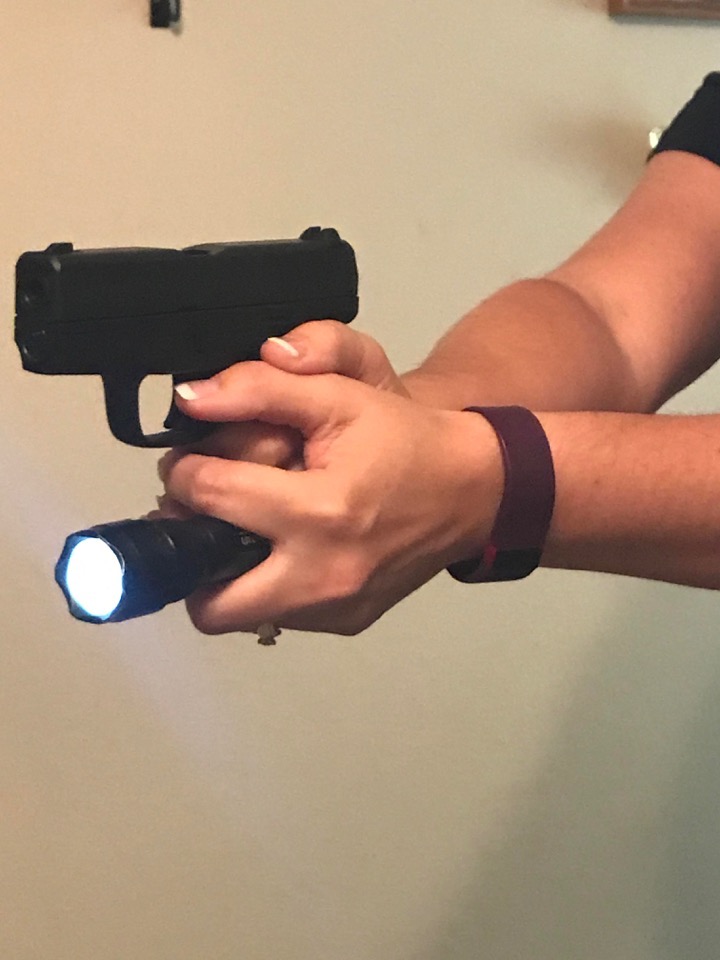
- SureFire—You’ll need a small-bodied flashlight with an activation button on the end of the tailpiece and, ideally, a rubber grommet positioned just a few inches forward from the end of the light. Hold the flashlight like a syringe, between the index and the middle finger of your shooting hand with the activation switch placed against your palm. Grip the handgun as when using a normal two-handed grip, but only using the bottom two fingers of your non-shooting hand as part of that grip. To activate the light, squeeze it like a syringe, pushing the activation button with your palm.
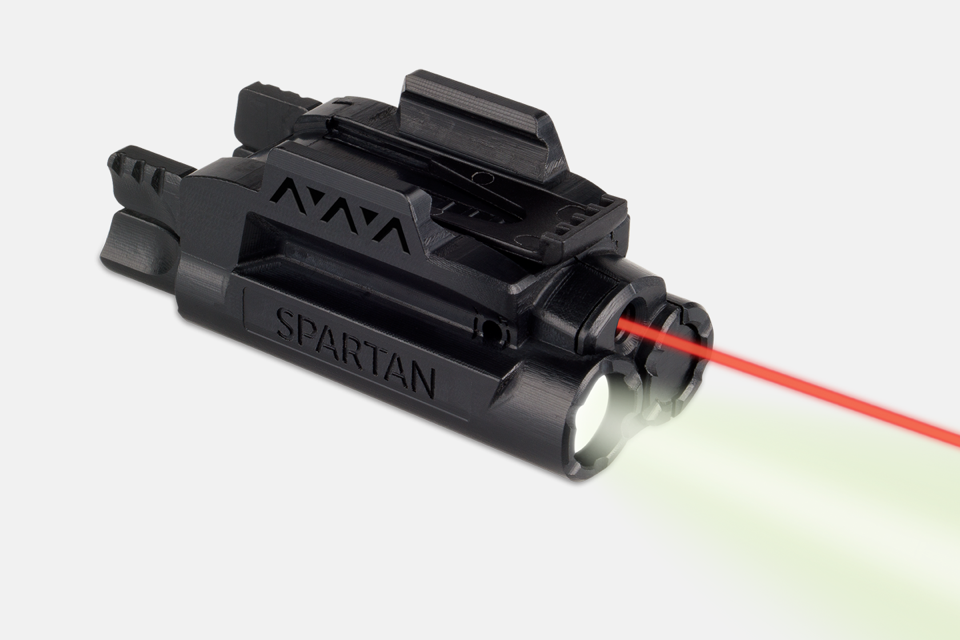
- Weapon-mounted lighting—Many manufacturers make weapon-mounted lights that fit around the trigger guard or mount to the tactical rail of your firearm. I’d highly recommend one that can be easily turned on and off manually, and that doesn’t come on automatically when the grip is squeezed.
- Locate the threat and illuminate the target. As stated in the scenario above, unless you have identified your target, you shouldn’t be engaging them. The L.I.E. principle is an easy way to remember the steps. Locate: Using a ½-second burst of light to locate a potential threat. Identify: Using a 1-second burst of light to determine whether or not the person you’ve located is a potential threat. Engage: Pulling the trigger, with the light off if possible.
- Use the light to blind the assailant or intruder. Shining a bright light in an assailant’s eyes can temporarily cause him to lose focus, allowing you to escape (if possible) or draw your firearm.
- Shoot with/without using your sights. If it’s dark, can you even see your sights? Using the body-alignment technique, it is possible to point your firearm straight at your target and hit in the torso area, without using sights.
- Sight options: Night sights, glow-in-the-dark, fiber-optic and lasers are helpful when you’re in a low-light situation. If your firearm doesn’t have any of these, they can easily be purchased and installed.
- Use darkness to your advantage. You should be familiar enough with your house and its layout that you can walk through it at night without turning on lights. If a criminal were break in, you would have an advantage over him, and be able to remain hidden, using the element of surprise to engage the threat.
- Be careful not to bounce light off of cover. Should you need to use your light to locate or identify a threat, make sure that the light doesn’t reflect off walls, windows or mirrors, which can blind you temporarily.

Practicing flashlight holds during low-light shooting drills.
Low-Light Statistics
According to the Las Vegas Metropolitan Police Department’s deadly force statistical analysis in 2010–2011, criminal activity levels were highest during evening hours (6 p.m. until midnight). Many other reports also show that between 60 and 80 percent of police officer–involved shootings happen in low-light or no-light conditions. Criminals take advantage of the ability to hide or carry out criminal activity without being seen.
While the average gun owner probably isn’t in law enforcement, we can still assume that the likelihood of an event occurring during periods of reduced light can happen to us as ordinary citizens. Whether you find yourself in a dimly lit parking lot, or the darkness of your home, practicing for such circumstances improves reaction time and increases your confidence.
-

About Stacy Bright
Freelance writer Stacy Bright holds instructor certifications from the NRA in Pistol & Rifle, as well as being an Range Safety Officer and Refuse to be a Victim instructor. In addition to her NRA credentials, she also is a Missouri CCW instructor and teaches various other home and personal defense courses.
“In a field dominated by men, I feel I bring a unique perspective to firearms and training, especially to women. I'm passionate about educating, empowering and developing confidence in those I train. In November of 2014, I started the Southwest Missouri chapter of The Well Armed Woman,” said Stacy.
Stacy lives in southwest Missouri, and has been married for 20 years.
Visit TWAW Facebook page: The Well Armed Woman-Springfield, MO Chapter.
View all posts by Stacy Bright →
The Conversation


All excellent points; it may be advantageous to place night lights in strategic positions to ensure anyone moving through the house is either lighted or silhouetted. The lights do not have to be bright to identify a target or resident (humans are surprisingly good at identifying people by shape and gait), and red light will preserve night vision (old style Christmas tree light bulbs work great). If one is concerned about power outages, a low wattage LED bulb (Home Depot even has them in red) in a lamp that’s plugged into a UPS (battery backup for a computer) will keep the light on for hours even in a power outage.