It’s always a little bittersweet to see summer winding down, but that doesn’t mean you have to hit the pause button on your outdoor adventures. Fall is fast approaching, and deer season is right around the corner. Whether you’re looking to hang a trophy buck on your wall, fill the freezer with venison or both, trail cameras are an excellent way to keep your eye on the woods and lead you to success. Here’s how to get the most out of them throughout the season.

The Bright Side of the Road is sponsored by Vista Outdoor.
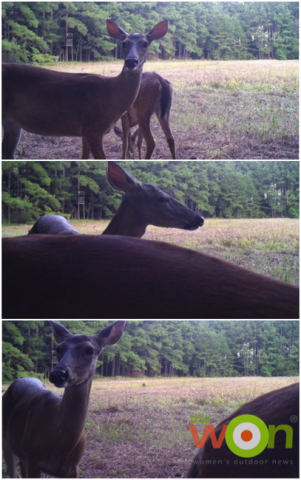
Let’s face it: There’s only so much scouting and surveying we deer hunters can do with our own eyes. As much as we might wish otherwise, we just can’t be in the woods at all times, or be at every food plot and bedding area at the same time. Trail cameras solve that problem. Trail cams are useful year-round, helping you monitor your land and herd—revealing everything from which does produced offspring and when those fawns dropped to which bucks survived last year and are back for another season. It’s certainly exciting to find out that the 3-year-old bruiser 6-point you spotted last year is still around, only now he’s an 8-point shooter. You can use trail cameras to check out other species, too. Spring turkeys can be elusive, but a camera just might help you bag that tom (or at least a very curious hen).
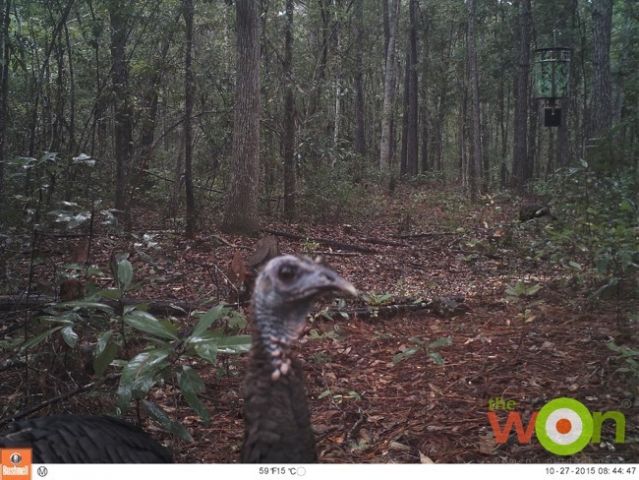
Turkeys always seem to know when it isn’t their season. We had these birds all over our stand for nearly the entire deer season last year.
So, where do we start? If you don’t already have a few, purchase some high-quality trail cameras. It’s possible to spend an arm and a leg on these, but you certainly don’t have to. Still, it is worth paying a little more up front and getting a decent product. I use Bushnell’s 8MP Trophy Cam HD Night Vision Hybrid Trail Cameras (MSRP: $100) and I love them. I’ve gone with a cheap-o brand before, and paid for it: They only lasted 1 season and I had to buy new ones the following year. I give Bushnell’s excellent products two thumbs up.
With your trail cameras and a good-size SD card, you’re almost ready to capture game. The SD cards I use are 16 GB at minimum, and typically 32 GB. If you fill up the memory a few days after setting the camera out, you could miss out on some great intel. Also, before you head to the woods, make sure you update your camera’s firmware, regardless of the brand. The manufacturer might have found a bug that could corrupt your camera or SD card, rendering them useless.

With some fresh batteries, these cams are ready to get back in the woods.
Now let’s put those cameras to work. The first thing to consider is where to set them up. Are you monitoring a wide-open food plot, or a well-placed feeder in a small clearing? Maybe you know of a hidden game trail that leads from a bedding area to water source, and get an inkling that a big buck will make his way there. Depending on the amount of land you’ve got to cover, and the terrain you’re looking at, there are a multitude of options and things to consider.
Obviously, location is key. If you want to get deer on your camera, you have to put your camera where the deer are (or, at least where they could be). Choose a location you can get to fairly easily, and without disturbing the area too much. If you’ve got a lot of land, make a note of the camera’s coordinates so you can easily find it.
There are a few schools of thought in terms of how high (or low) you should set up your camera, but I really think it depends on the area you’re covering. If you mount the camera on the low side, about 3 feet high, your point of view is essentially face-to-face with the deer. This is a good choice for monitoring a corn pile (where legal) or mineral block, and will give you a clear shot of necks, bellies and tarsal stains—an excellent way to help determine the age of a buck. Keeping a “snack” in the field of view is a good way to capture a still deer, rather than catching a quick, passing shot.
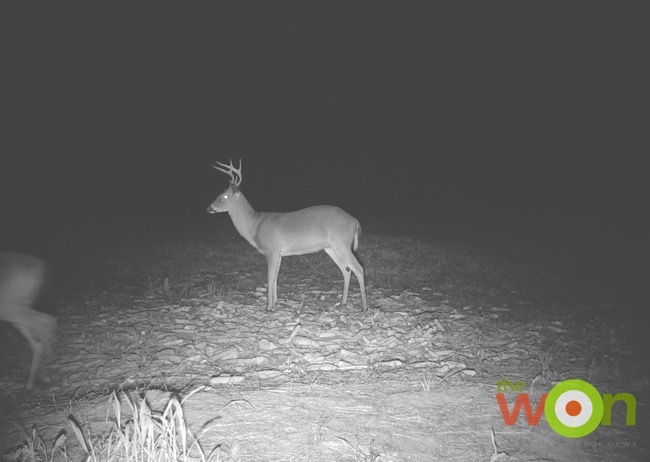
Just make sure the camera is set back at least 10–20 feet from where you think the deer will stop. Otherwise you could end up with a lot of rump shots, in which all you can see is a portion of the deer’s hindquarters. You also run the risk of spooking deer when the camera goes off.
Although entertaining, these shots aren’t very helpful in identifying that deer.
A great way to avoid spooking deer is to mount the camera higher up—say, 6 feet off the ground. That puts the camera out of a deer’s immediate plane of sight, so they are less likely to be startled by, or even notice, the flash. A higher camera can also give you a better view of a buck’s rack, although you may lose sight of his neck and belly. If you are going to mount the camera at 6 feet or higher, however, be sure to take the angle into account. Point the camera at least a few degrees toward the ground; otherwise you could miss the deer entirely. Use a mount that includes a swivel, or just wedge a short stick perpendicularly between the camera and the tree to keep its place.
Angles also come into play if you want to set up the camera to monitor a particular game trail. Take care to face it at about a 45-degree angle, rather than directly perpendicular to the trail. This way, you’ll get a much wider field of view and see farther up or down the trail.
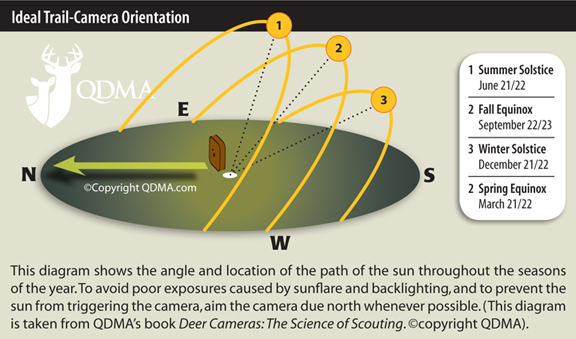
Lastly, don’t forget about the sun. There are a few tricks to avoid over-exposed photos and getting dozens of those obnoxious “false” shots that just take a photo of the empty field. Avoid putting the camera on an edge where the shade and sun meet; try to face it north if possible. The shade path will move throughout the day as the sun rises and sets, and the passing shadow can activate the sensitive triggers on trail cams. The Quality Deer Management Association provided a great diagram a few years ago illustrating how the sun moves throughout the year, and where you should point your camera.
Most trail cameras allow you to set the trigger sensitivity. Too high, and you’ll have a photo of each blade of grass twisting in the wind; too low, and you might only catch the tail end of a deer because your camera took too long to activate as it strolled by.
You may need to adjust your camera locations as the seasons change. In the late summer, food and water sources are hot spots, as are field edges leading to travel routes. As fall begins, leaves will change and eventually fall, so those food sources can shift along with a thinning woodland cover. Food plots may still be bountiful, but pre-rut activity will change deer patterns as scrapes and rubs become more active. Once the rut is in full force, food is no longer the first thing on bucks’ minds: They’ll seek more secluded areas like deep woods for breeding and avoiding hunters and other bucks alike. As the rut ends and winter sets in, most deer will seek the remaining food sources. Keep an eye on the seasons, and if your photos show a drop in deer, you’ll know it’s time to rethink your camera location.
Now that we’ve set out cameras, we arrive at our next topic: Just how often should you check them? It’s most important to make sure you don’t over check your cameras. Deer can pattern you the same way you pattern them, and you’ll always want to let the area “cool down” after you’ve been in to set up or grab an SD card. Wearing gloves and using scent-lock spray help minimize your impact on the camera’s immediate area. I’ll even use the scent-lock spray on the camera itself before putting it out.
Rainy days are ideal to visit your cams—the damp air muddles your scent, and it will dissipate more quickly. On the other hand, immediately after a rain is not ideal—everything is freshly “cleaned” and your scent will be much more likely to linger.
If you’ve set your camera up in an area that is easily accessible, try driving your truck or ATV directly to its location, and leave it running while you check the SD card. Deer are much more likely to be used to, and less startled by, the sound of a motor coming in and then leaving, since they likely hear you driving around elsewhere on your property on a regular basis. You can also check a camera on the way to a stand prior to your hunt. If you’ve got to walk by it anyway, why make another trip and risk busting a deer? I like to bring a spare SD card with me in this case and swap them out on my walk in. That way my camera has a fresh card and I can check the previous one as soon as I’m back at my computer.
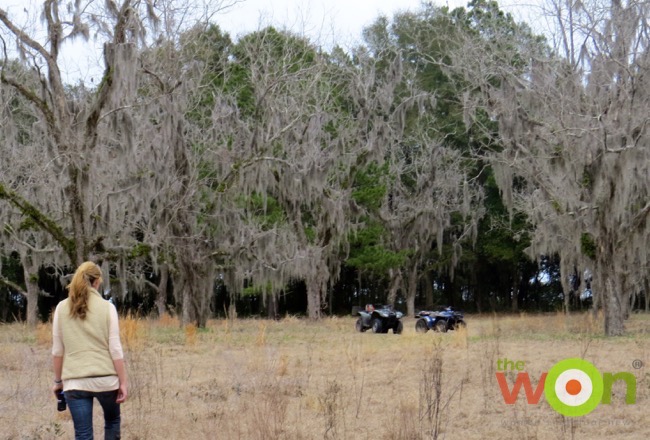
Leave your ATV or truck running. The deer are used to it and it will help mask the sounds you make while checking the camera.
If you’re set up to monitor a rub or scrape, try to wait as long as possible to check your card—I’d say one week, minimum. As I mentioned, deer can pattern you, and it won’t take long for a wary buck to figure our your strategy and flee the area for good. Once you catch a good buck on your trail camera, it can be tempting to check on his return as much as possible. Fight the urge. Take your time and try to pattern him, instead of letting him do the same to you. Check his antlers, tarsal stains, neck and belly—all easily identifiable from a well-placed camera. Then you can head him off at the pass. Typically, the first photo you get of a deer will indicate the direction from which it came
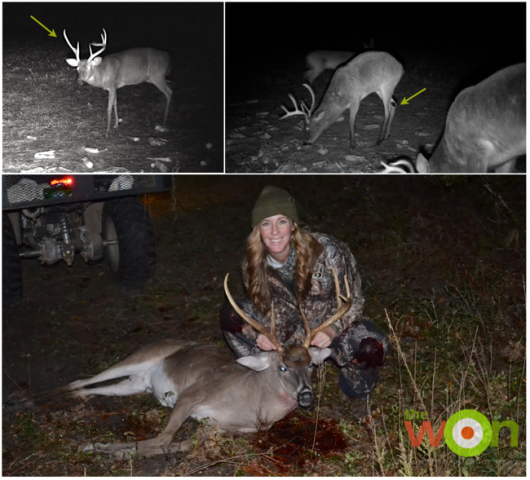
Putting these methods to use, I was able to bag this deer with the help of trail cameras in 2013. He was a large buck (particularly for our area), and he had already passed on the genes from his affectionately named “gnarly” rack. The trail cams showed us this was a mature deer, but it didn’t take long to pattern him We were able to determine where this buck was coming from on his way to eat each night, and what time he would arrive to feed. He would inch out of the woods from a particularly thick patch of brush at dusk, but waited at the edge until after dark to head into the field. By the time he reached the corn it was always past shooting time, so waiting until then wasn’t an option. With that in mind, I set myself up to take him before he stepped into the field. Ol’ Gnarly came in just over 170 pounds (mid-rut, and after a fair amount of blood loss), and was about 4.5 years old.
Here’s to another successful deer season!
This Retro WON first appeared August 30, 2016.

Hollis Lumpkin writes that she is a "simple girl living in the Lowcountry of South Carolina, but I happen to have a great love for the outdoors, particularly hunting and fishing." She is a duck-hunting freak. Hollis pens an exclusive version of "The Bright Side of the Road," for The WON. View all posts by Hollis Lumpkin