If you kept up with The WON last month, then you’re probably pretty intrigued by the sport of archery. Let’s assume you’ve gotten your hands on a bow, have found a place to shoot, and are ready to start. Besides finding a coach to help you with your technique, you’re going to need to tune your bow. Tuning is the process of setting up your “stick and string” to shoot accurately.
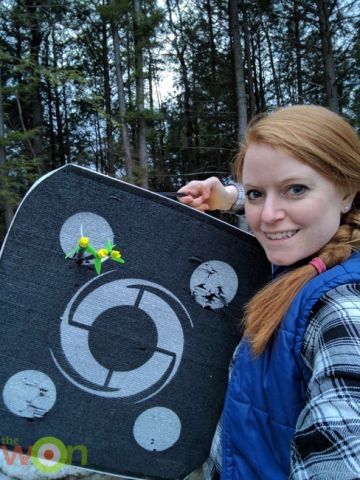
A tuned bow is a happy bow, and a happy bow shoots great groups! (Emily Monroe photo)
In last month’s column, I detailed what you would need to start shooting a compound bow. Although a lot of factors combine to make a bow accurate, I’m going to specifically focus on your sights, arrow rest and stabilizers.
Sights
There are quite a few options for bow sights, and depending on your tastes, brand preferences and budget, you can go in a few different directions. Most hunting and beginner bow sights use fiber-optic pins. You aim by placing those pins over the object of interest, which is either a target or the vitals of a game animal. To explain how to adjust your sights, I figure “showing” is better than describing just with words, so please check out this video.
For reference, I have a single-pin HHA Optimizer Lite sight with a sight-extending arm. I chose a single-pin sight to simplify my sight picture and to reduce the number of potential sources of error (#engineer) on each shot. If you have a multi-pin sight, you will want to adjust each pin individually at the specific distance you want to set it for, following the method I show in this video. A sample set of distances would be 15 yards or less, 25 yards, and 30 yards.
Remember to keep your sight level as you shoot. Many sights come with a built-in bubble level, and with practice you can make leveling your sights a subconscious part of your shot process.
Sight alignment is also important. If you’re having trouble seeing through your rear peep sight, ask for help. I tried adjusting this myself, and I can make small tweaks. But if it is far out of alignment from the factory settings, the archery tech at a pro shop or the coach at your archery club is your best bet for adjusting the peep sight while looking at your position at full draw.
Emily prefers the simplified sight picture with a single-pin sight. The bubble level helps with consistency between shots. (Emily Monroe photo)
Arrow Rest
It’s critical that you align your arrow rest so that your arrows shoot straight out of your bow. This means adjusting the rest until your arrow is roughly level when you’re at full draw. This might also mean sliding your D-loop (or wherever you knock your arrow) up and down the string. If you are working with someone, like an archery tech or a coach, they will be able to help you get a rough alignment of your arrow rest by making adjustments when you are at full draw.
This drop-away arrow rest is a good “middle ground” option between a target arrow rest, known for accuracy, and a whisker biscuit, known for arrow retention. (Emily Monroe photo)
If you are on your own, the easiest way to align your arrow rest is to do what is called “paper tuning.” In essence, this means shooting through a piece of paper at close distance and looking at the tears created by the shaft and fletching. A non-straight arrow will show up as offset tears in the paper, whereas a well-tuned arrow and arrow rest will tear the paper in the profile of the shaft and fletching, with even tearing on all sides. For more on paper tuning, check out this technical article from Lancaster Archery Supply.
Stabilizers
A good way to get your bow set up for you is to add stabilizers to it. These are essentially rigid shafts of aluminum, carbon fiber or another stiff material that you can add weight to in order to change how your shot feels before, during, and after aiming. Stabilizers thread onto the riser of your bow. They alter the moments of inertia of your bow, which can really help keep your sights level and help with follow-through on shots.
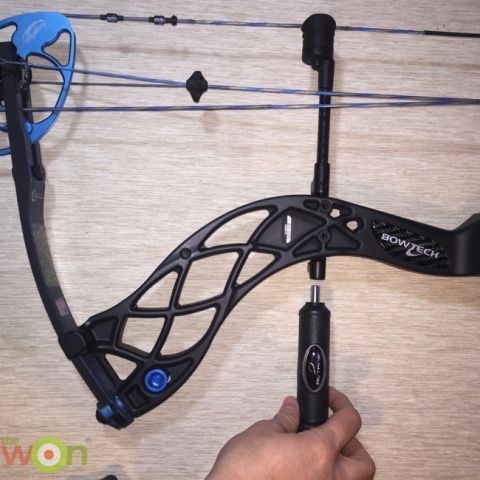
Most stabilizers, like this Octane 8-inch hunting stabilizer, attach to threaded inserts on the bow riser. (Emily Monroe photo)
Stabilizers seem to live at the border of “trial and error” and “voodoo magic.” As a data-head and physics nerd, I wish I could say there is a way to calculate stabilizer weight and length with free-body diagrams and a calculator. Alas, it appears the best way to determine your stabilizer needs is to try out a few and see how each feels. You can spend as much money as you want on stabilizers—lots of brands make a variety of options at different prices. From AAE and TAP to Doinker and Shrewd, there are plenty of stabilizer choices.
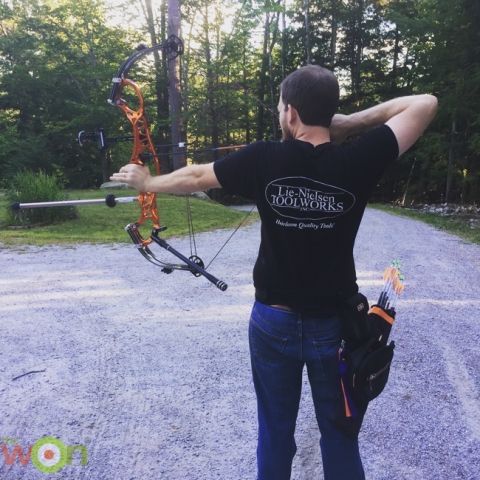
Emily’s husband uses two stabilizers—one in the front and one to the side. Both stabilizers are long and have weights that thread onto the end to change the moment of inertia and the “feel” of the bow. (Emily Monroe photo)
The best—and most affordable—way I found to try out different stabilizers was to ask various members of my archery club for advice, and then start small. I initially purchased an 8-inch Octane hunting stabilizer with my compound bow, but I continually struggled to keep my bow level without putting some force on it with my left wrist. As a next step up, I decided to buy the western hunter stabilizer package from AAE on Amazon; this came with an offset/side mount stabilizer. That little side mount rod made a big difference in keeping my sights level, and the package came with a couple different weight options for me to add to the end of the stabilizer rods to fine-tune the feel.
My husband has a set of stabilizers with interchangeable weights from Shrewd for his target bow, a Hoyt Pro Comp Elite, and he loves how adjustable it is. I’m not yet willing to make the financial leap into a target stabilizer setup on my bow, which I’m using for both target shooting and hunting, but I know there are endless possibilities of stabilizer combinations.
Tuning your bow is essential to make accurate shots. I hope this quick overview provides some guidance on how to start.
This Retro WON first appeared March 14, 2017.

It started as sibling rivalry and grew into a lifelong passion. Target shooting is at the core of Emily Houston Monroe's past, present, and future. A decorated junior and collegiate rifle shooter, Emily now works as an engineer at a leading firearms manufacturer where she can bring her passion for firearms to a new level. In her blog The “How-To” Gun Girl, she will share her experience in various shooting sports. From targets to turkeys. From smallbore rifle up to .338 Lapua Magnum. From 10 meters to 1600 yards. If it is a shooting sport, the "How-To" Gun Girl will try it out and explain it all. View all posts by Emily Houston Monroe