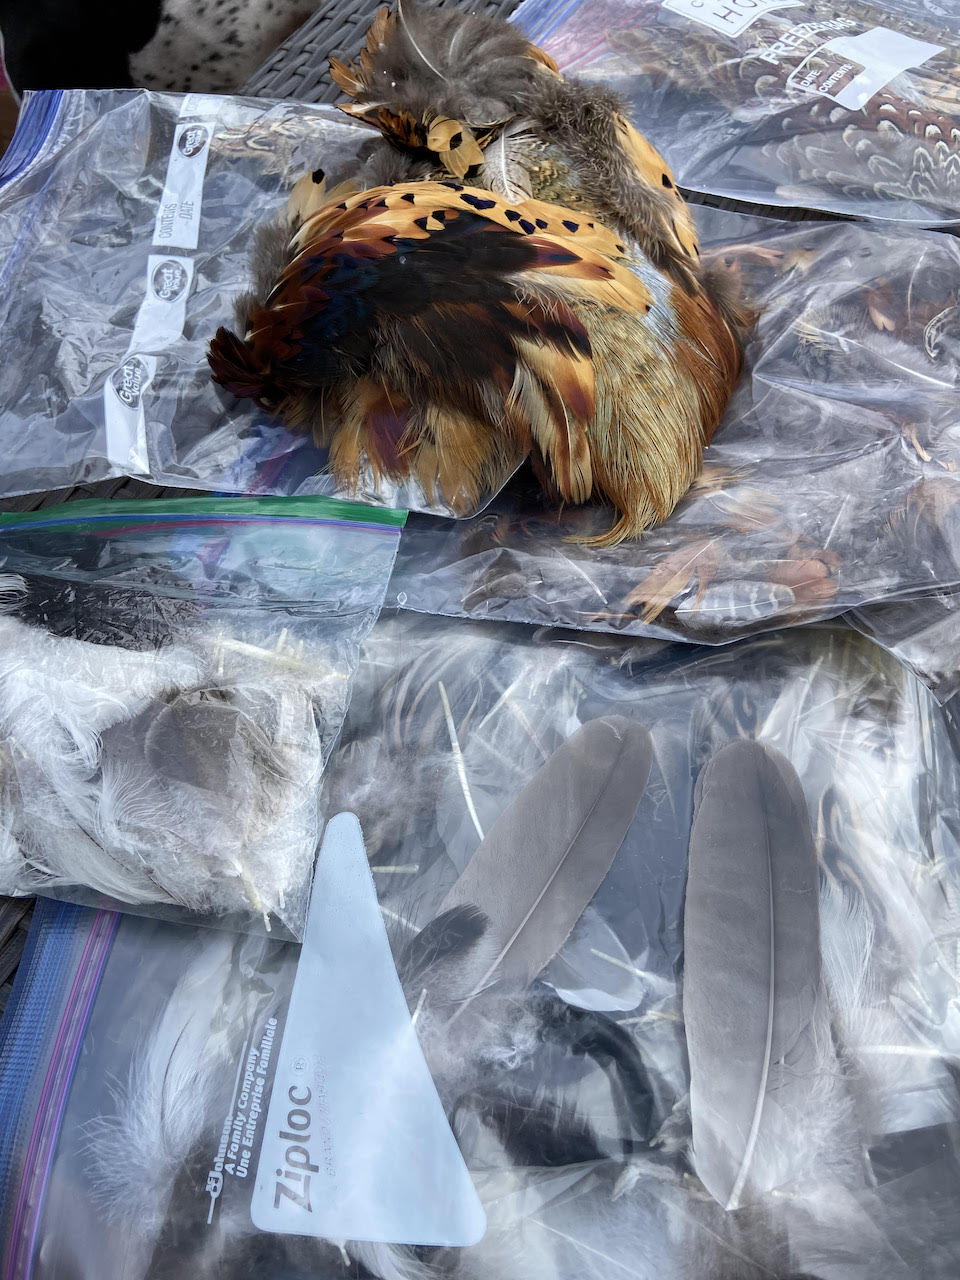
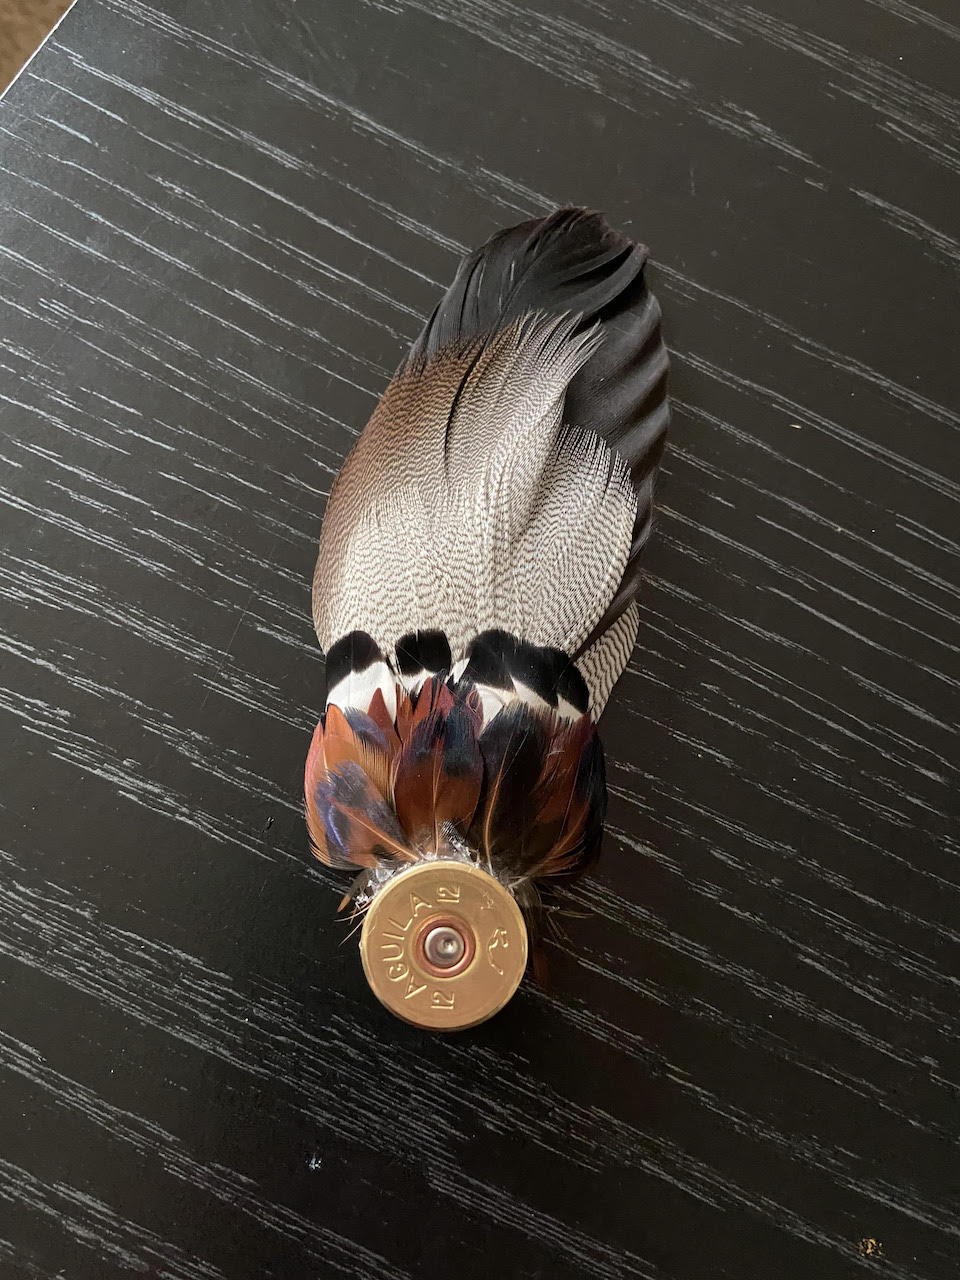
As the Kansas hunting season is coming to an end, I brought home more from our Wander Woman – Kansas hunts than just memories. I started to collect feathers from each of our pheasant or waterfowl hunts. Even when I wasn’t successful harvesting a bird, my hunting partners were happy to share the feathers from their trip. There are so many different crafts I can put together from all these feathers I have gathered, but one of my favorite crafts is a pheasant feather pendant for my new hats. It is a great way to showcase your successful time outdoors.
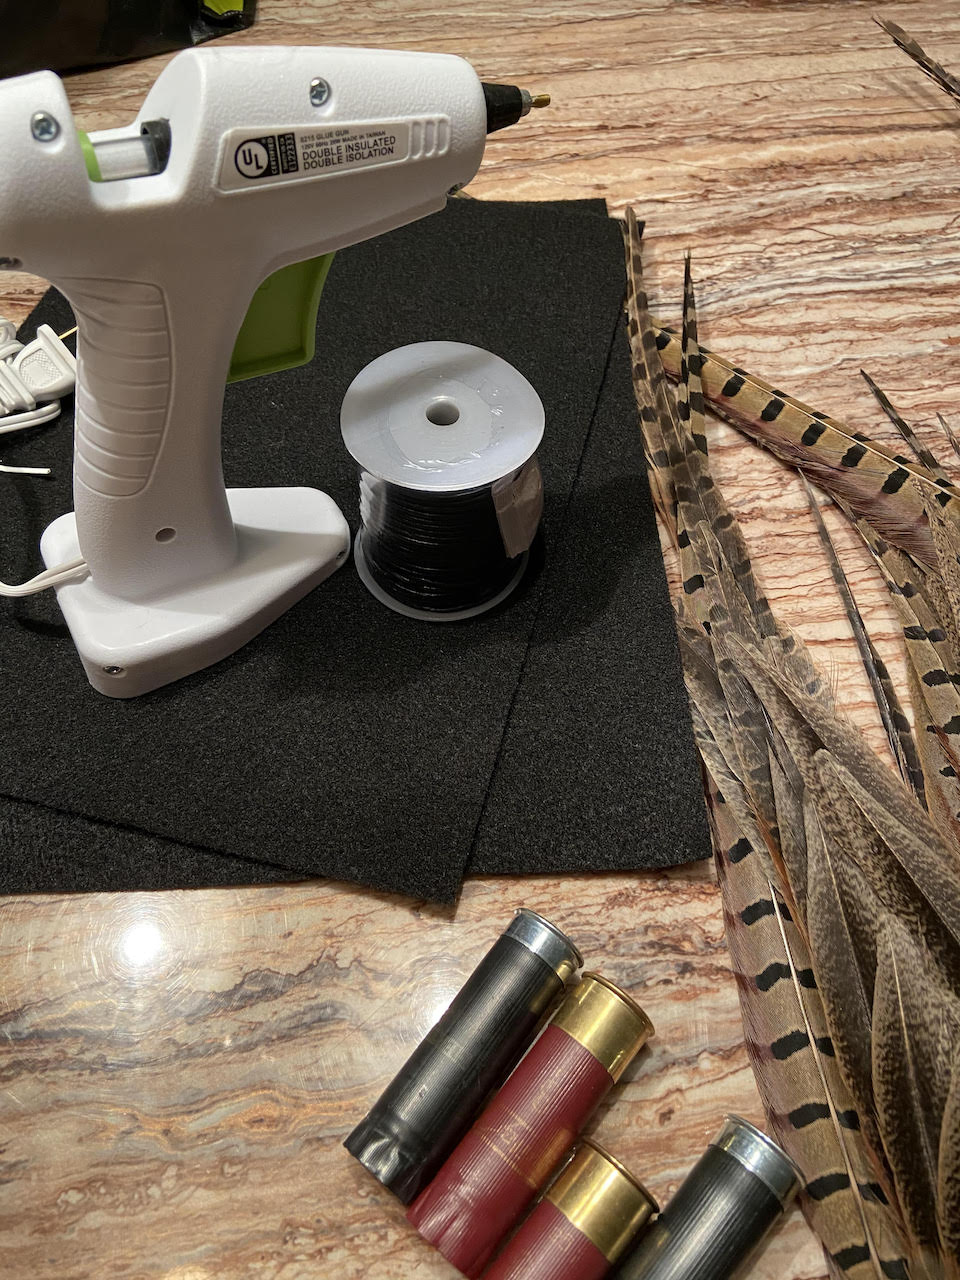
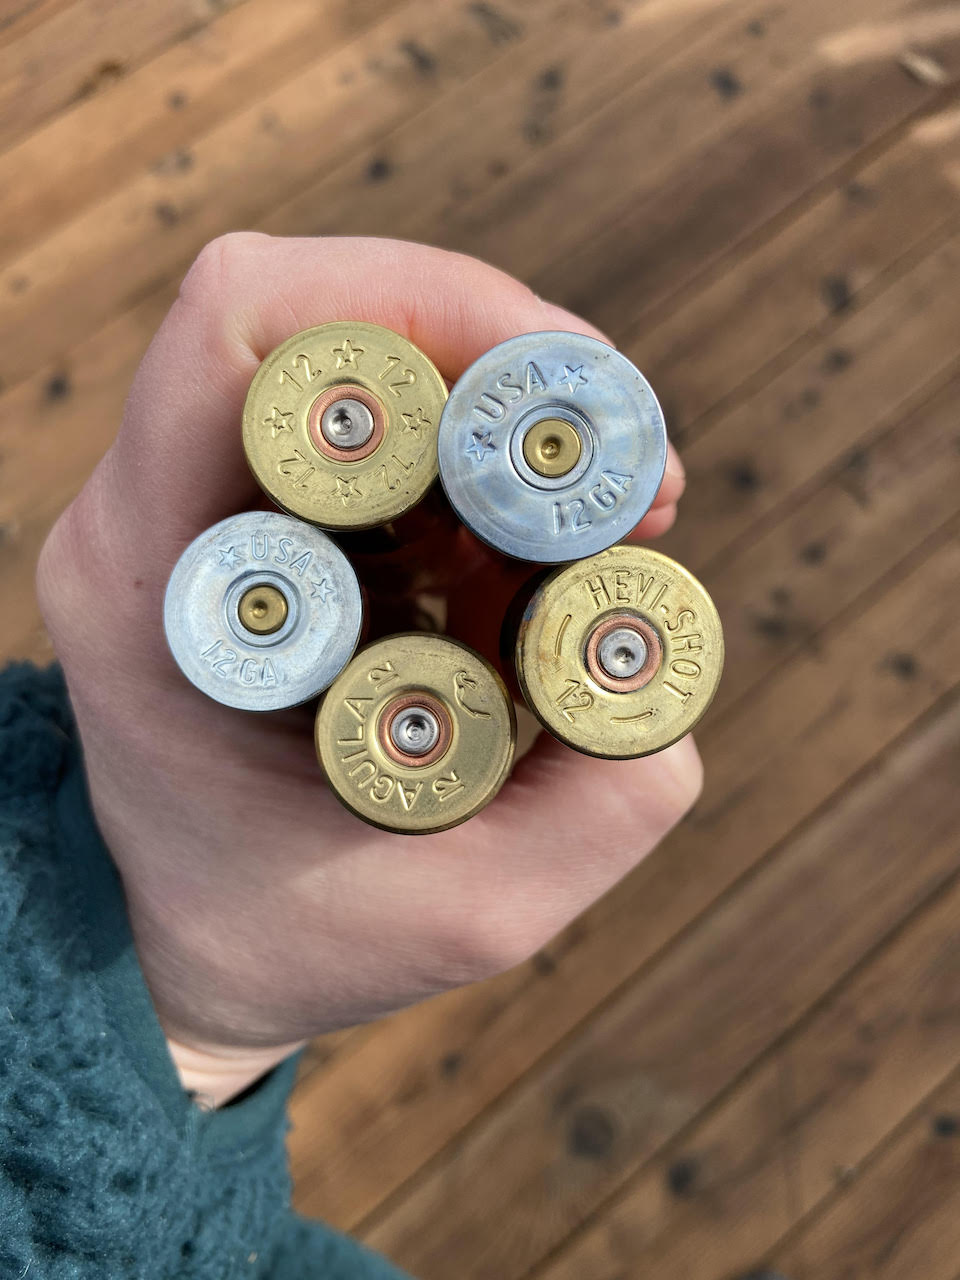
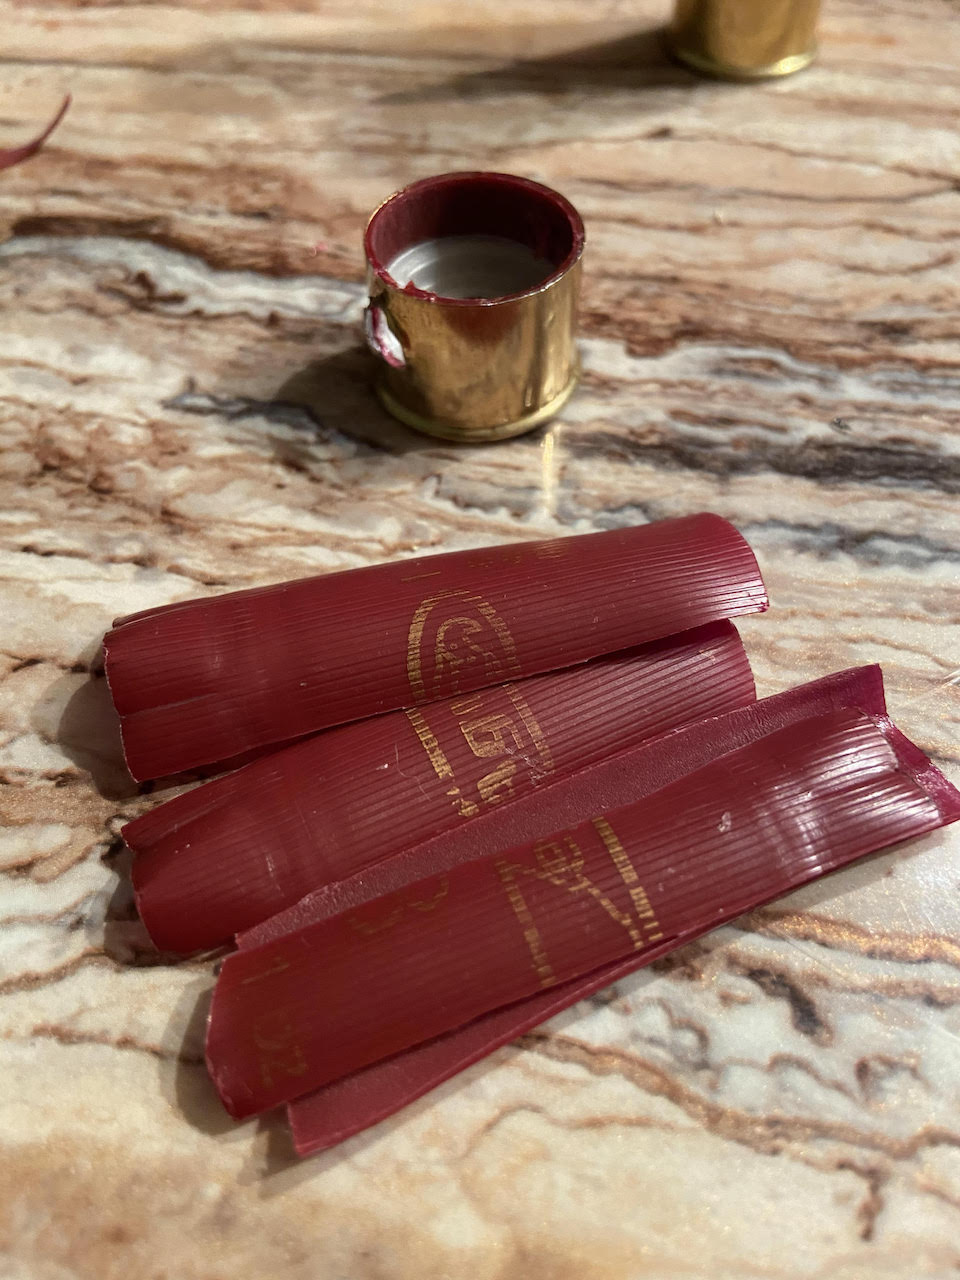
1 Choose which shotgun shell casing you want to use. I started collecting options of ones I liked the most. You’ll also want to go with the high brass since there is more space to drill and glue your feathers.
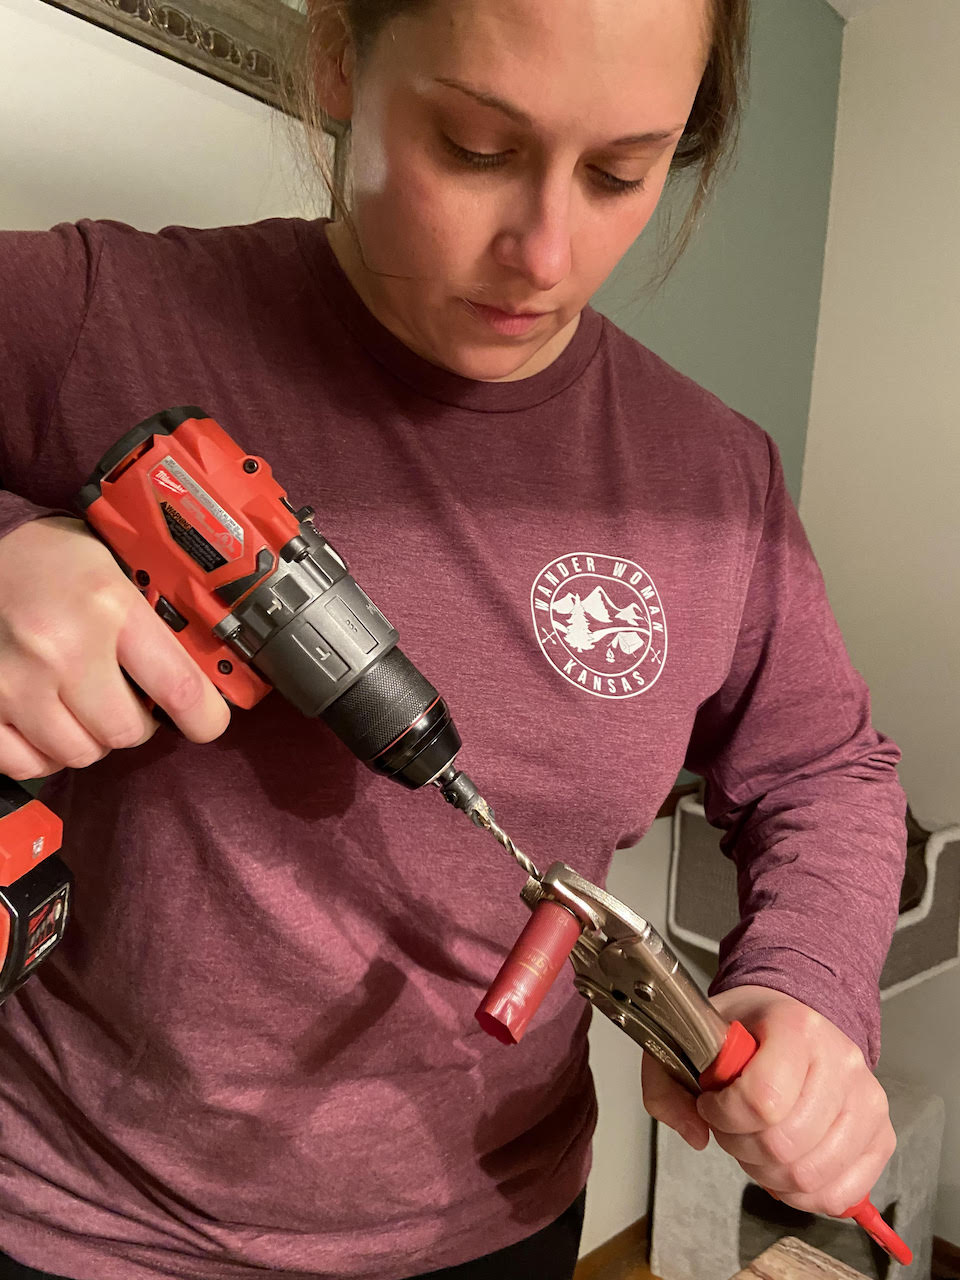
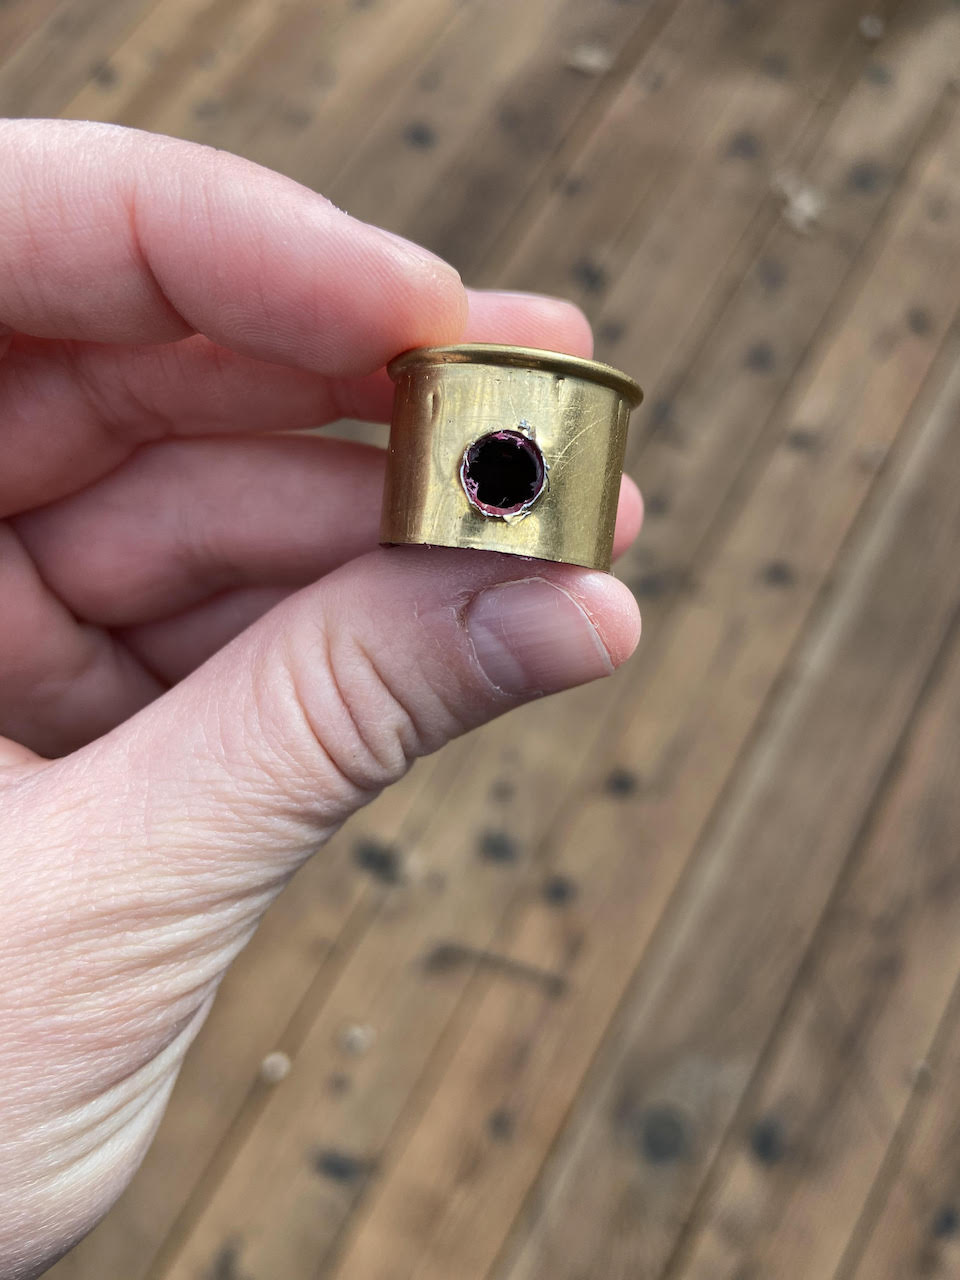
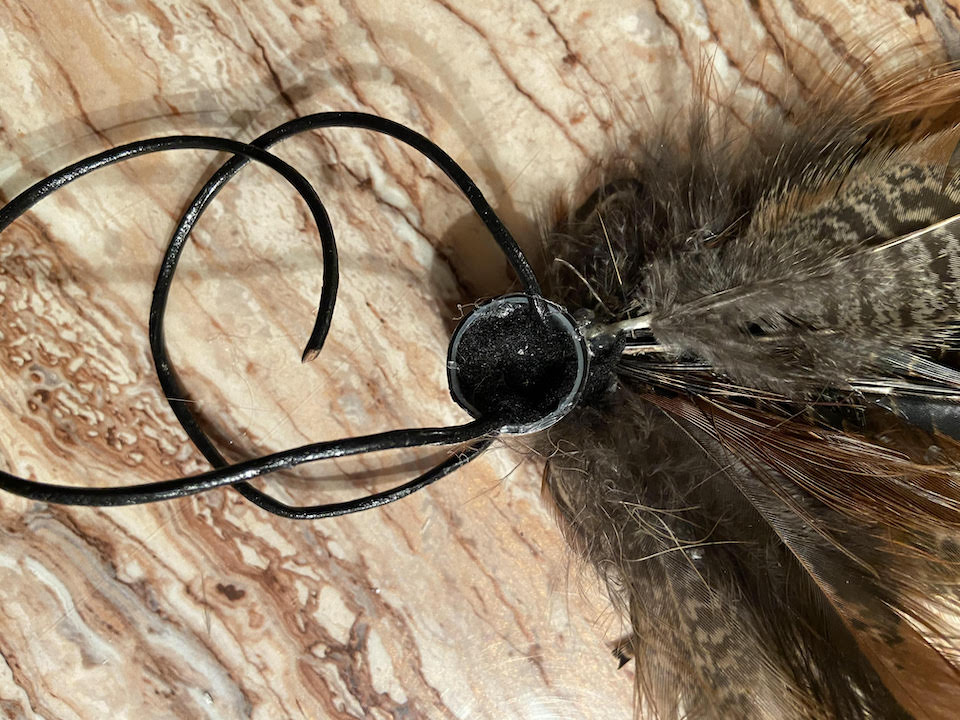
2 I took the pliers to hold the shell tight while I used the drill to make the hole I will use to stuff feathers for the piece. I used a 3/16th drill bit, but you can use whatever size you think works for what you are designing.
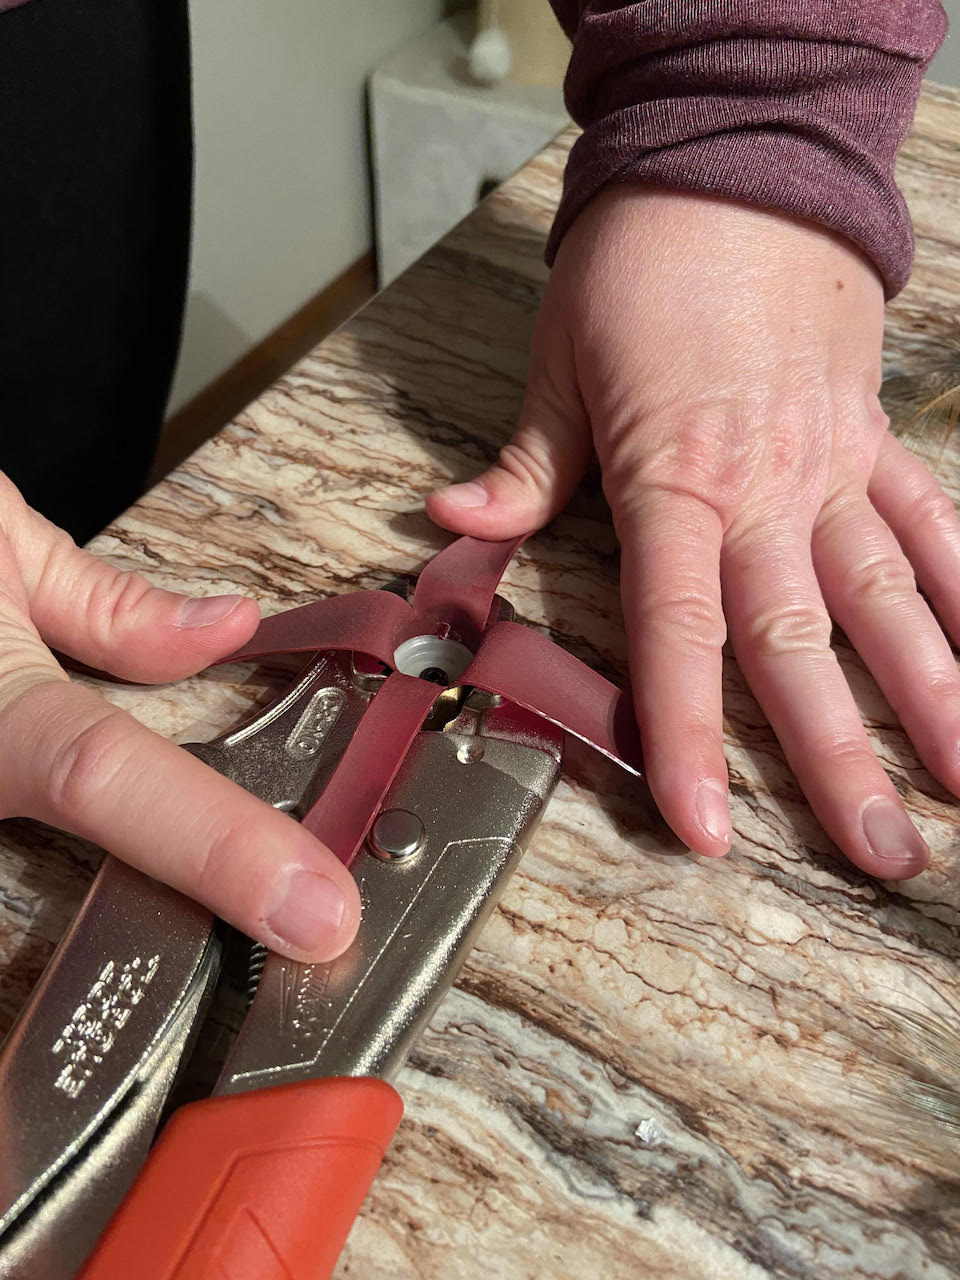
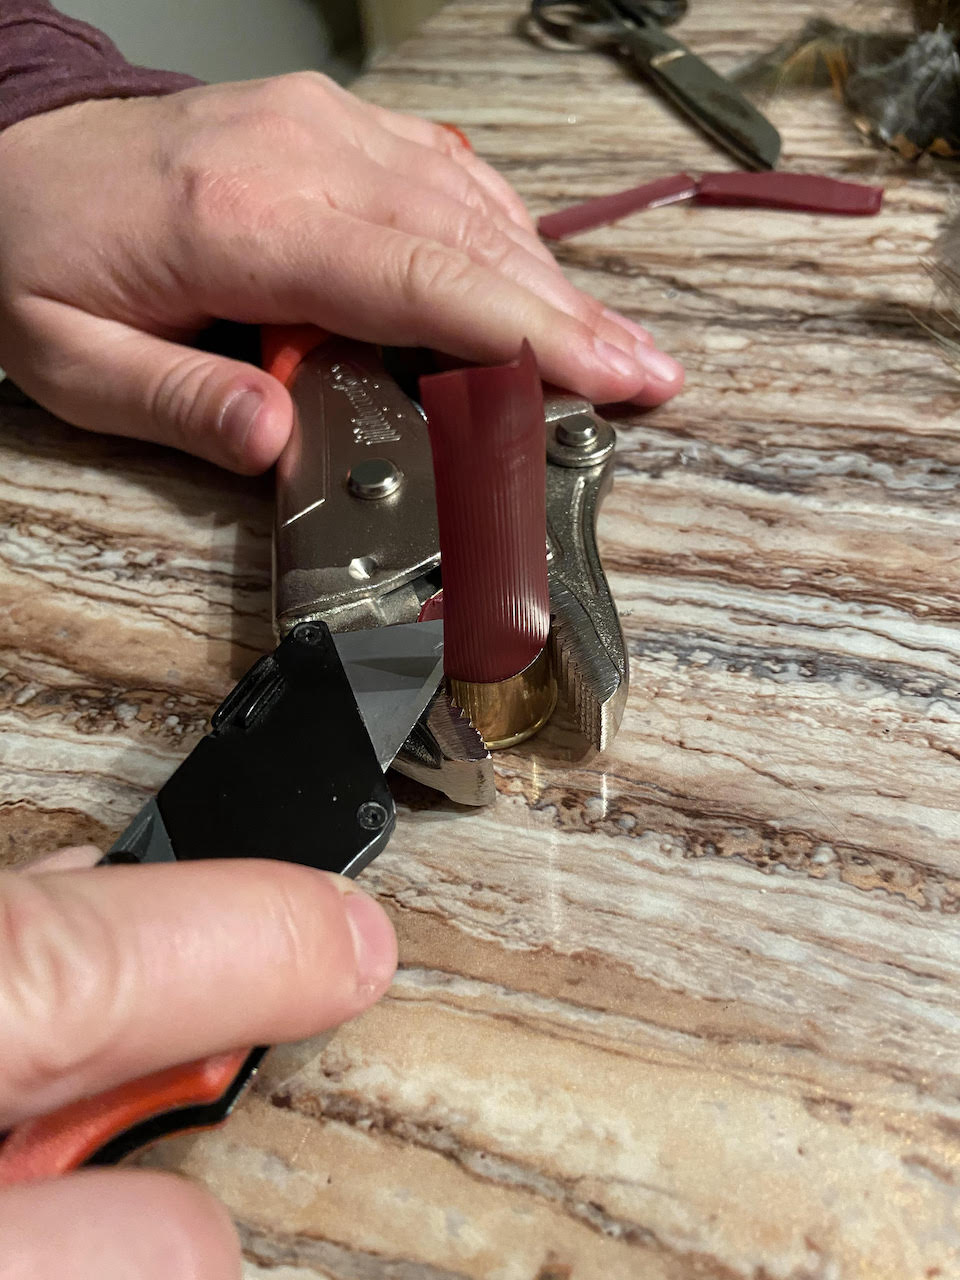
3 Once you get the hole drilled in, you will want to cut off the plastic from the shell using your utility knife. I cut the plastic down towards the brass in fourths to make it easier to remove. Then you will want to clean up any excess plastic left on the brass.
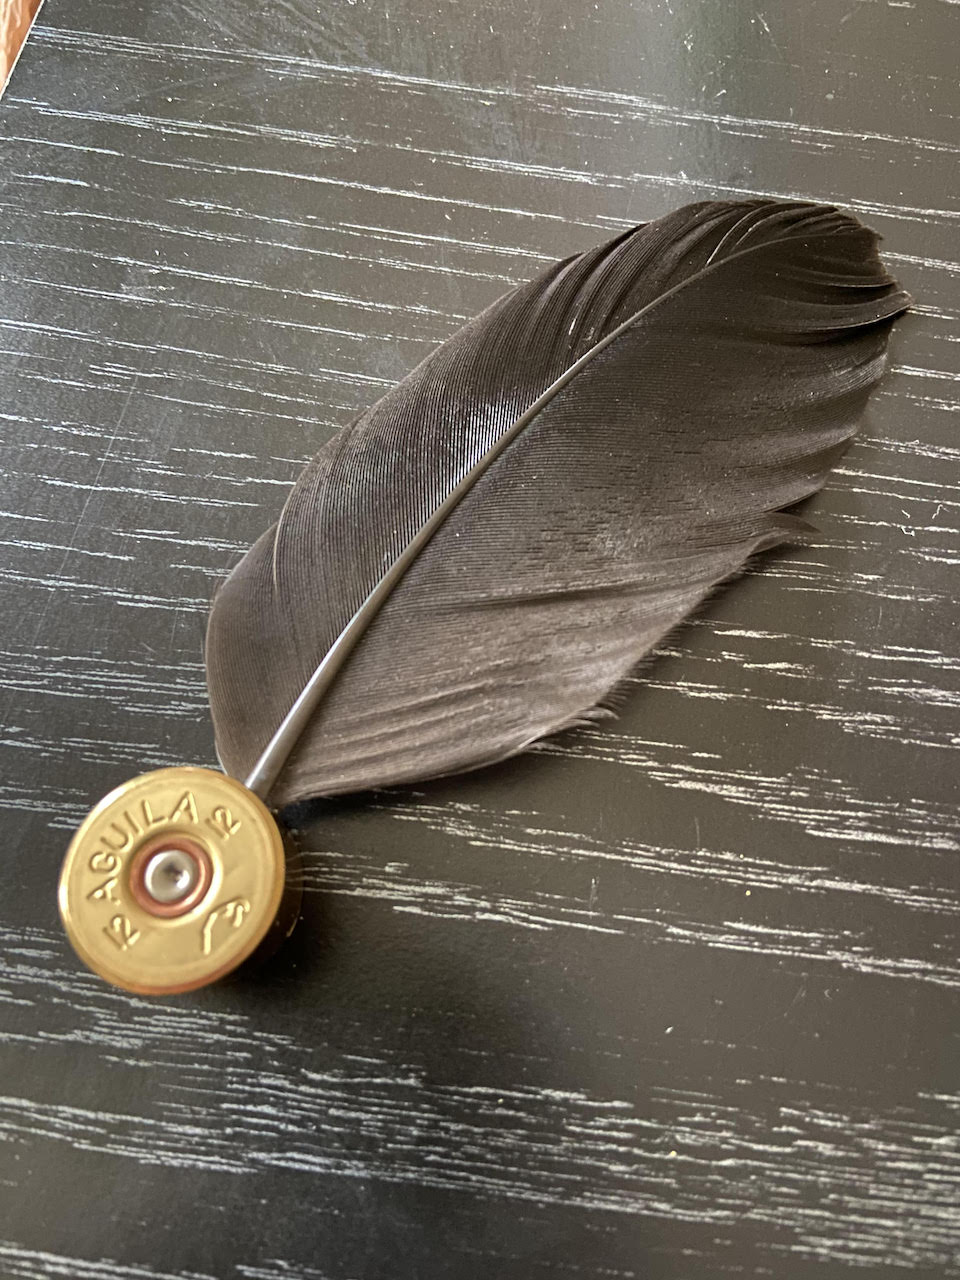
4 Once the brass is all cleaned up, you can start choosing your feathers to design! I played around with different designs, colors and textures until I found what I liked. First, I choose the biggest feather that I used for the base. You’ll want to use a small dab of hot glue inside the brass to set the large feather.
5 When the glue dries and your main feather is set, you start to build with your other feathers around it.
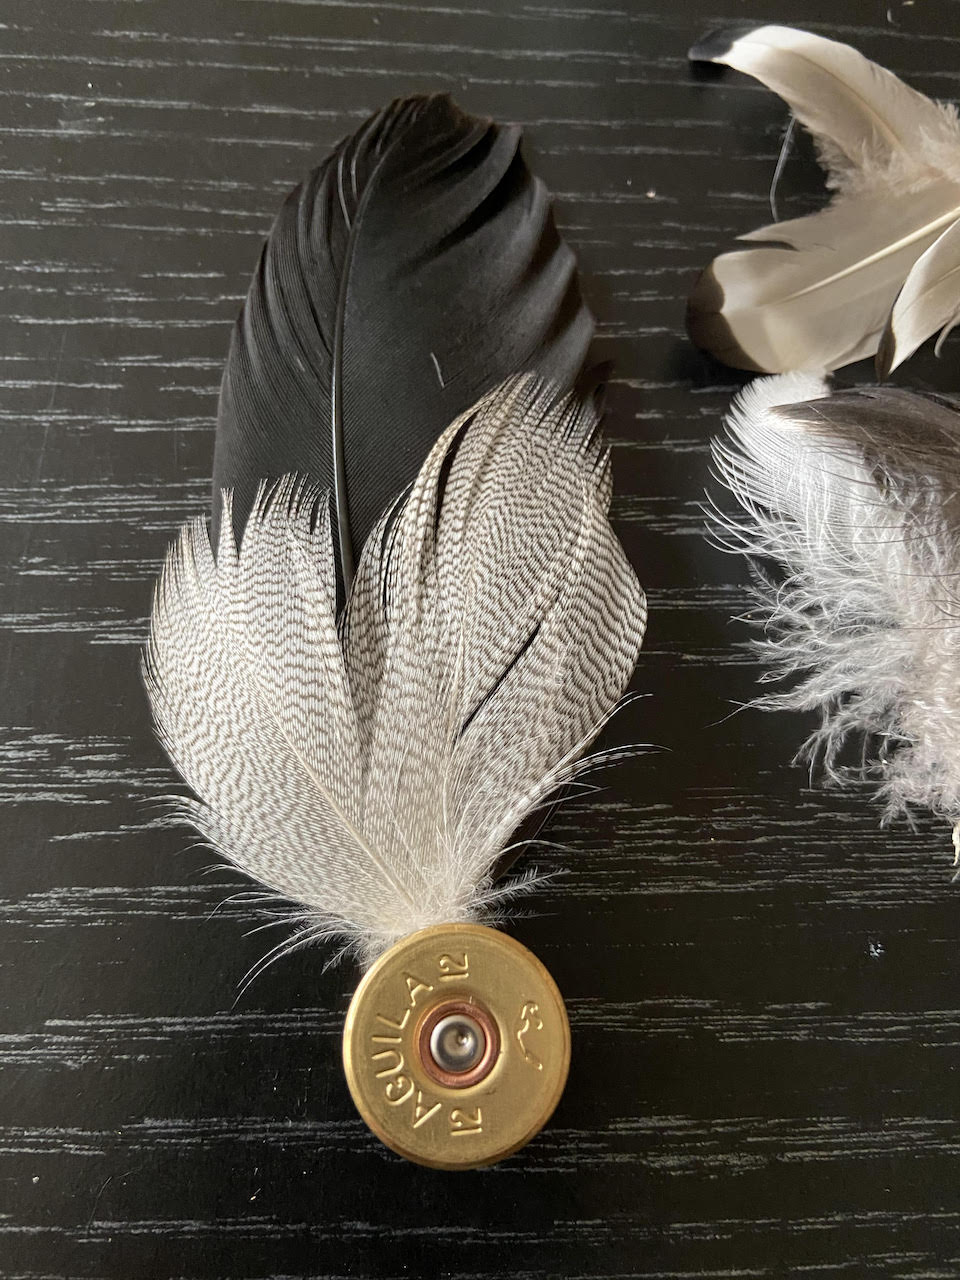
6 I found that at a certain point, only so many of the calamus (quills) to the feather will fit in the hole you made in the brass. Once filled, I took smaller colorful feathers, cut the calamus down on each one and glued the feathers directly to the brass.
7 I let all of the glue dry and then went back with my utility knife to clean off the glue as much as possible.
8 For the last step, I attached a leather crafting string in order to tie the piece onto the hat. I cut a section off and placed the middle of the leather into the back of the brass opening – and I added a good amount of glue on top of the string filling the brass until the string seemed secure.
9 Measure out a piece of your felt that will fit the circumference of the brass. Place the felt over the string and hot glue you placed to secure everything. This will also secure your feathers again.
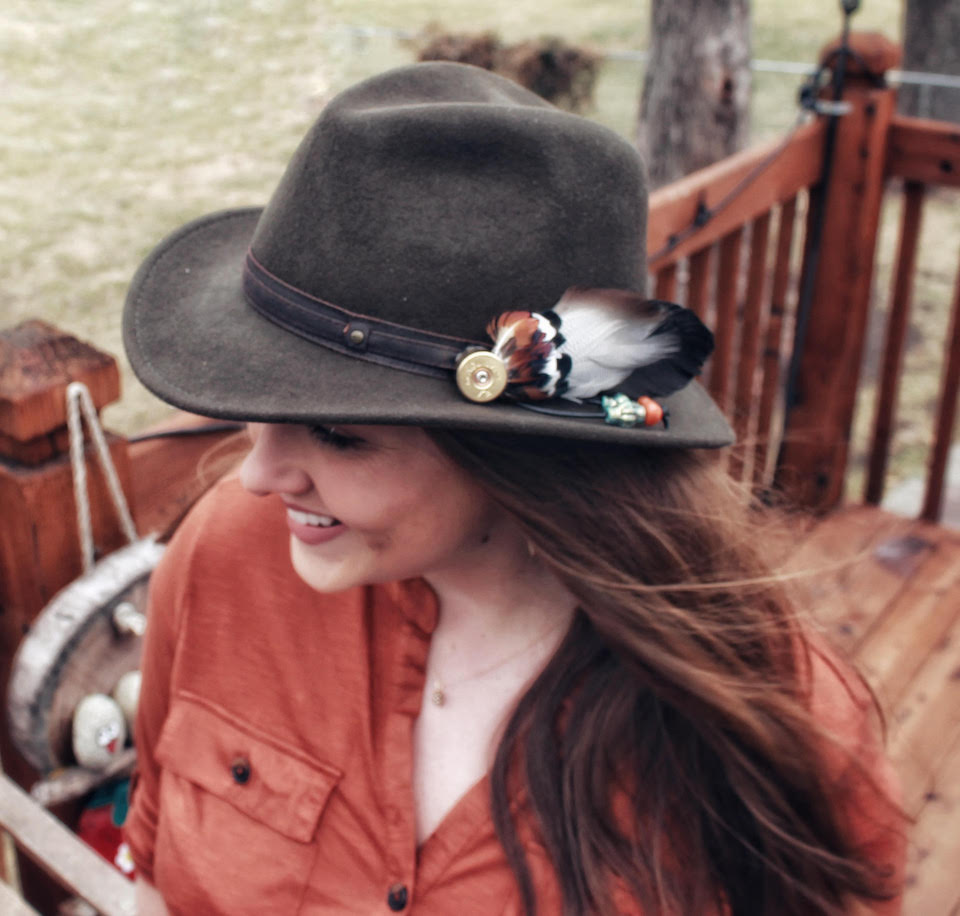
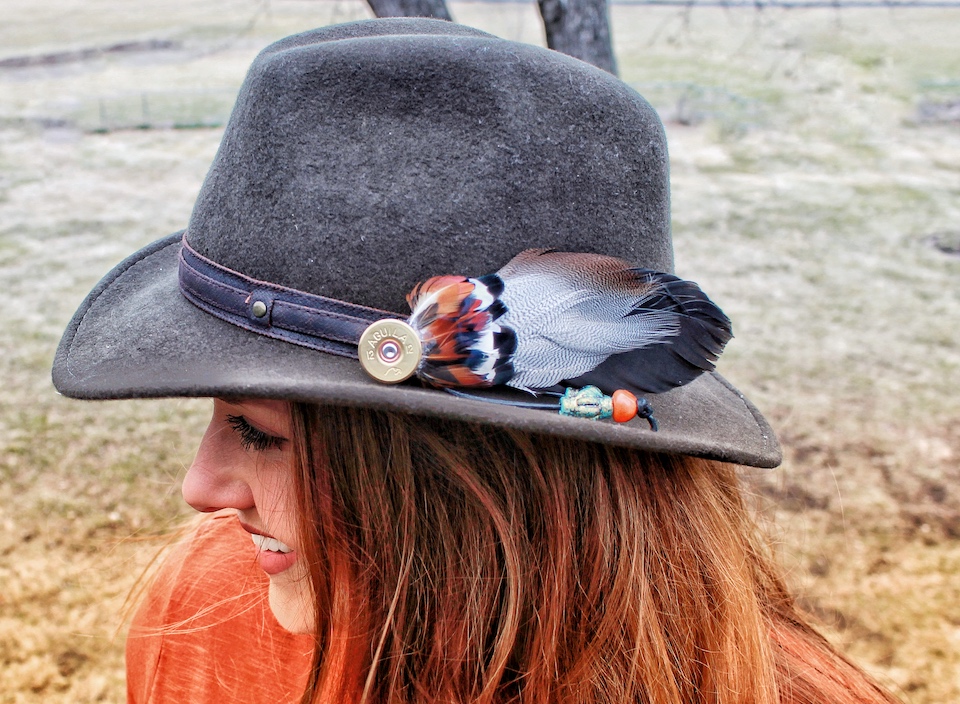
10 Your hat piece is complete! My hat has a leather hatband that I tied the feather pendant onto. This way, I can take it off and change it up whenever I like.

Jessica White is the founder of Wander Woman Kansas, an outdoor education program for women near the Kansas City area. She grew up with a family that spends time outdoors, which provided her a great deal of experiences. She has gone on every kind of hunting and fishing trip imaginable with her Dad. While he liked that part of the outdoors, her Mom, on the other hand, taught her the love of camping, canoeing, caving, rappelling and all kinds of outdoor sports. Jessica still enjoys trips with them, but she started Wander Woman to encourage other women to find themselves in the outdoors. View all posts by Jessica White