
Continuing from last week’s craft, here is another kid-friendly activity, paired with age-appropriate books. These Easy Egg Carton Fish are super simple and inexpensive to make – I had all of the materials in my cupboards. My inspiration came from this craft on Pinterest; I’ve detailed my version of the project, below.
You will need:
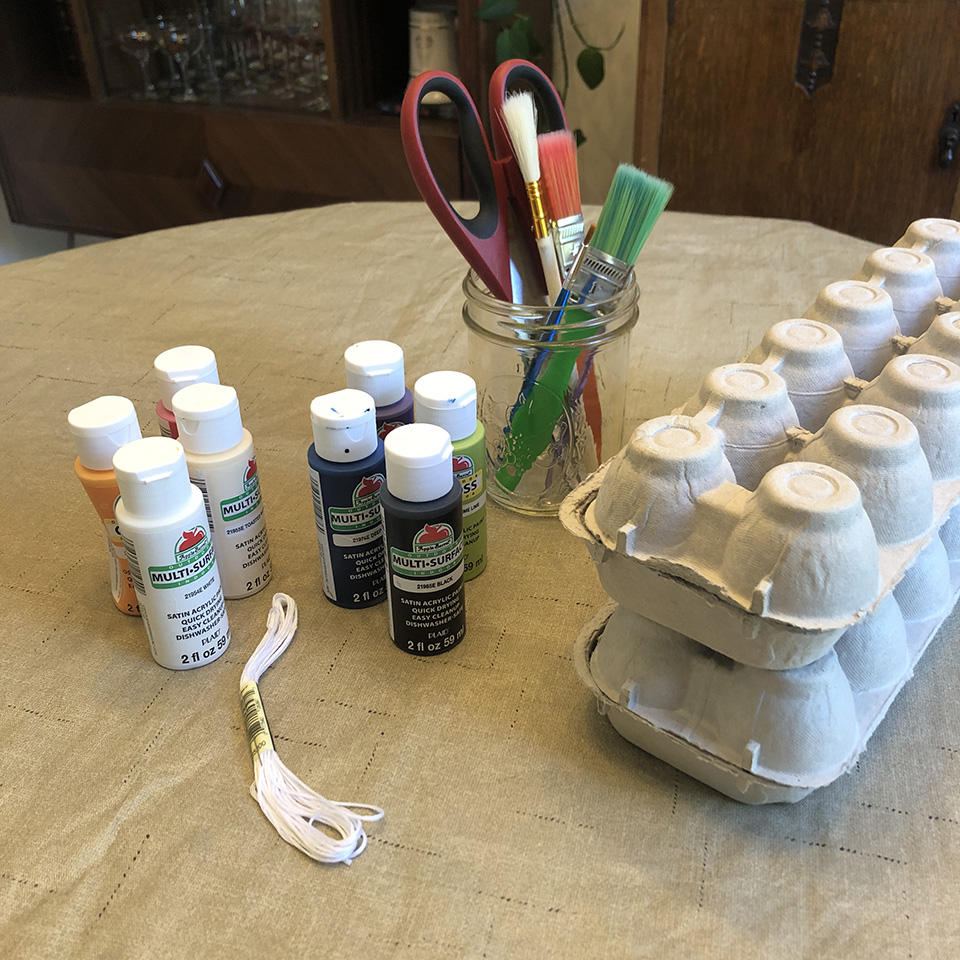
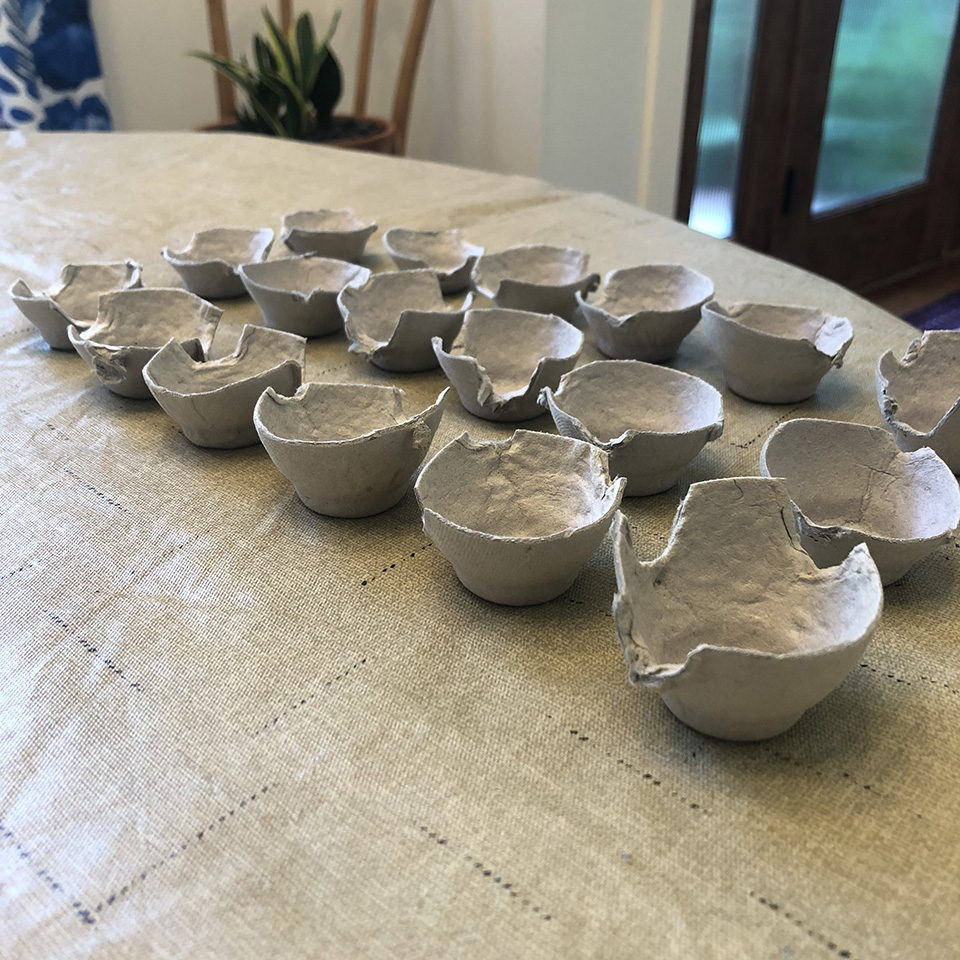
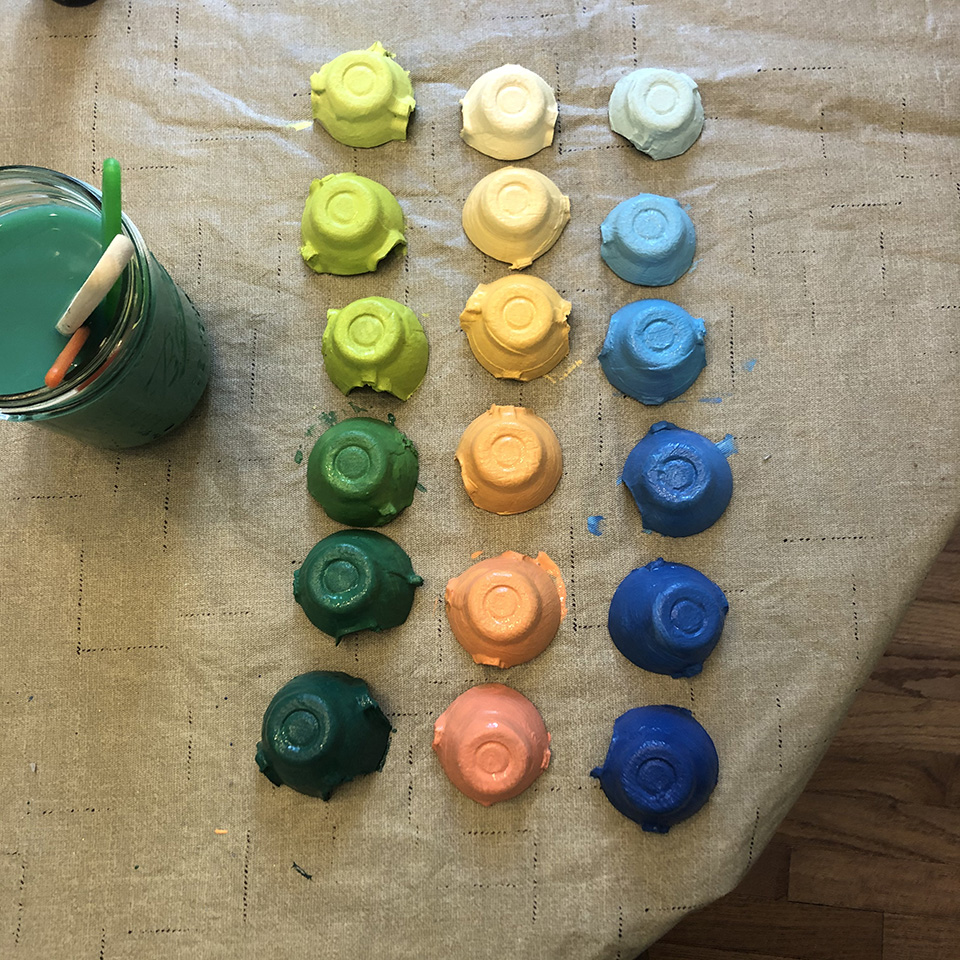
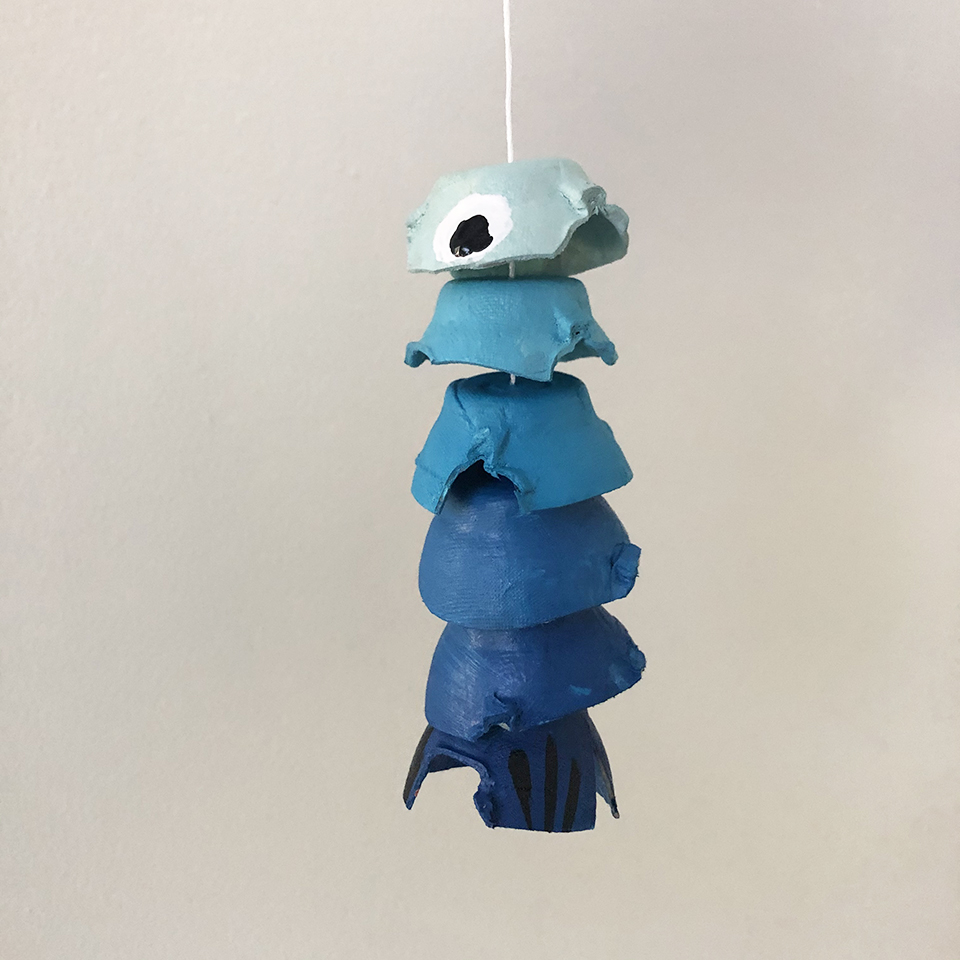
Begin by protecting your worksurface. I threw down an old, vinyl tablecloth, but newsprint would work well, too. I cut out the egg cups from each carton – I used 6 egg cups per fish (for a total of 1-½ egg cartons, of the dozen variety). I noticed that my egg cups came out all different sizes. Which, really, this is supposed to replicate nature – so it seems appropriate!
Arrange your egg cups from little to big, 6 cups per fish.
Using a paper bowl (or your paint palette of choice), lay down your paint. Because I was using what I had on-hand, I worked with a limited color palette. If you are also with working with just a smattering of paint colors, be sure to mix and blend them.
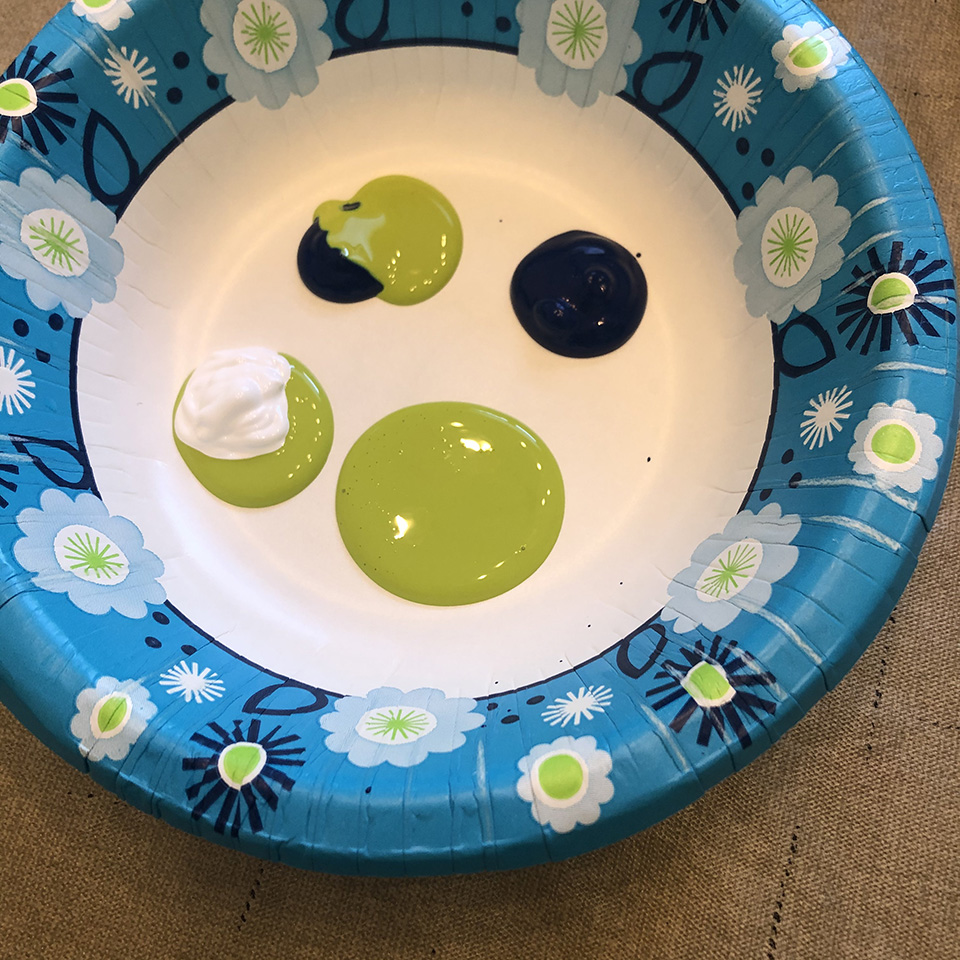
I blended my colors, working from light-to-dark, and was able to achieve a really cool, gradient effect.

Paint all of your egg cups, inside and out. Allow them to dry about 3-4 hours (depending on the thickness of paint). I only applied 1 coat to each cup, and saw good coverage.
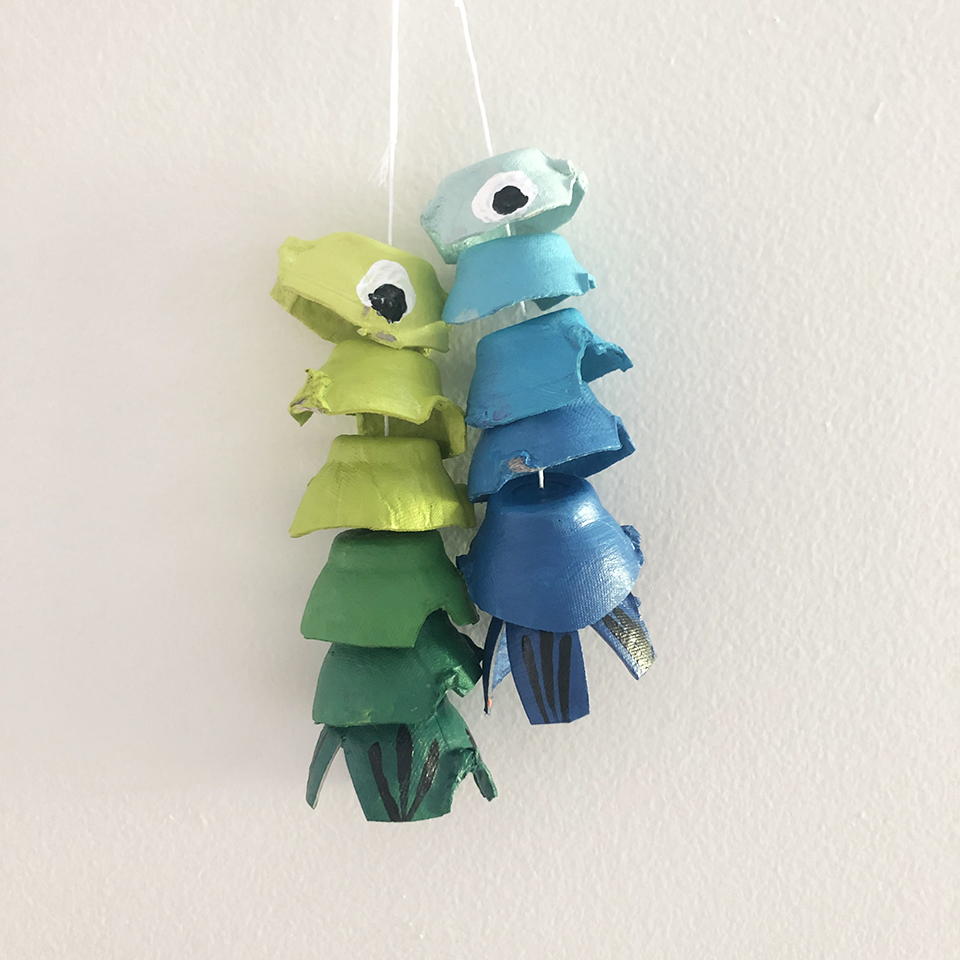
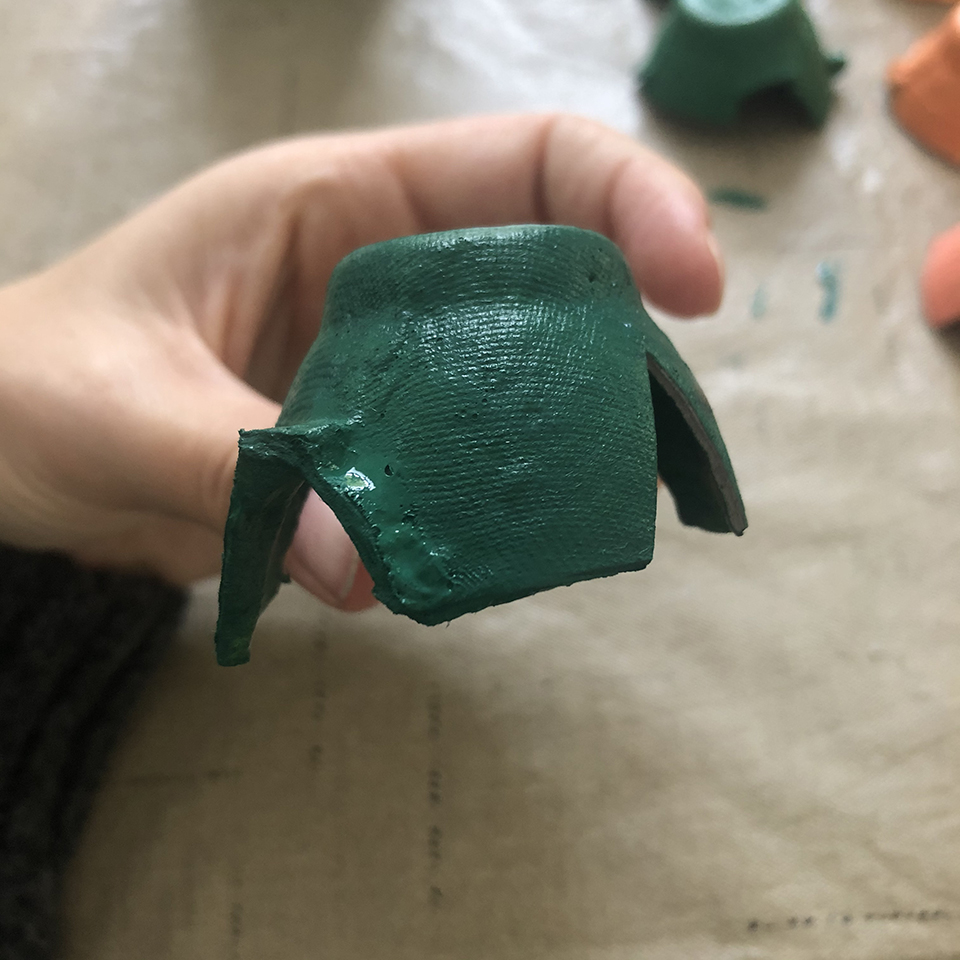
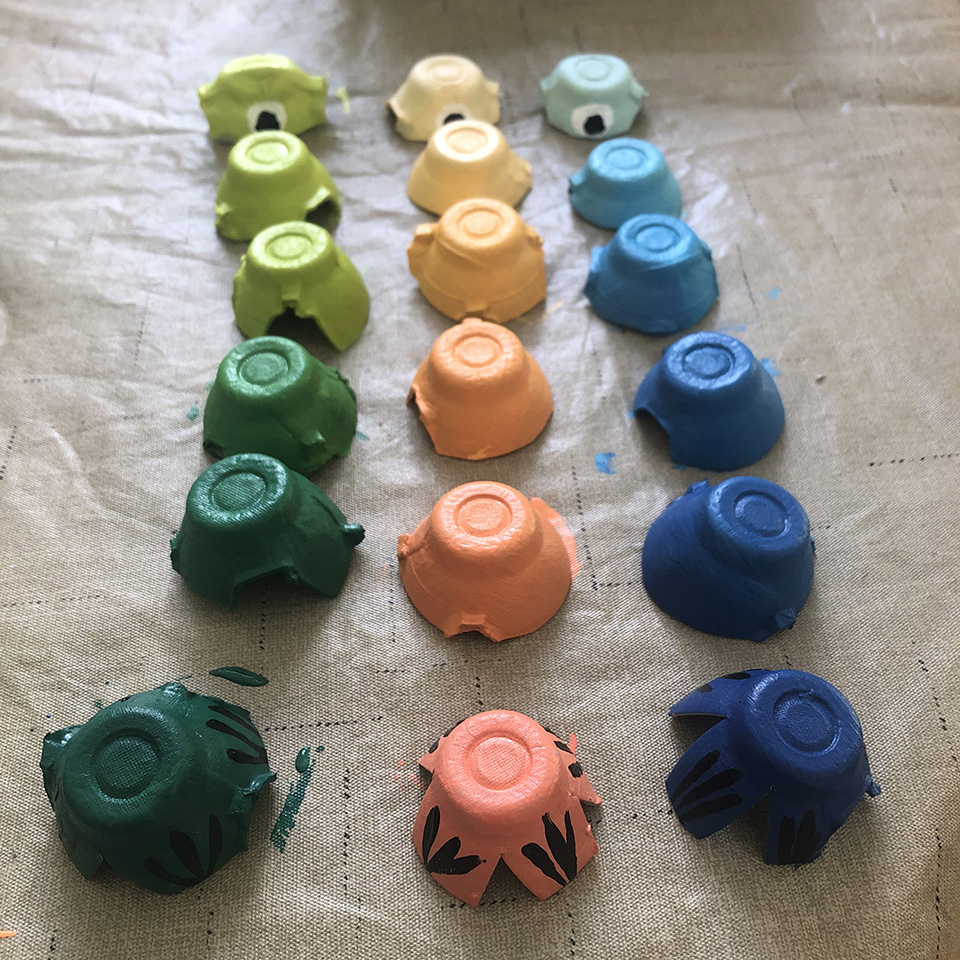
When your egg cups have dried, notch the largest cup for each fish to create 4 “fins.” Some of my egg cups already had notches, left from when I hacked … erm cut … them free from the carton. These notches work, too.
Slightly-squash (very technical term, I know!) the smallest cup for each fish, to create the fish’s “head.” Then, create the eyes. I simply painted the eyes on my fish, but this would be a fantastic application for googly-eyes, if you have them! Last, paint stripes on the “fins,” if your heart desires (and mine did).
When your egg cups are fully-dried, use your needle and yarn or thread to string them together, from large to small. I cut a length of about 12 inches of yarn and created a nice fat knot at the bottom.
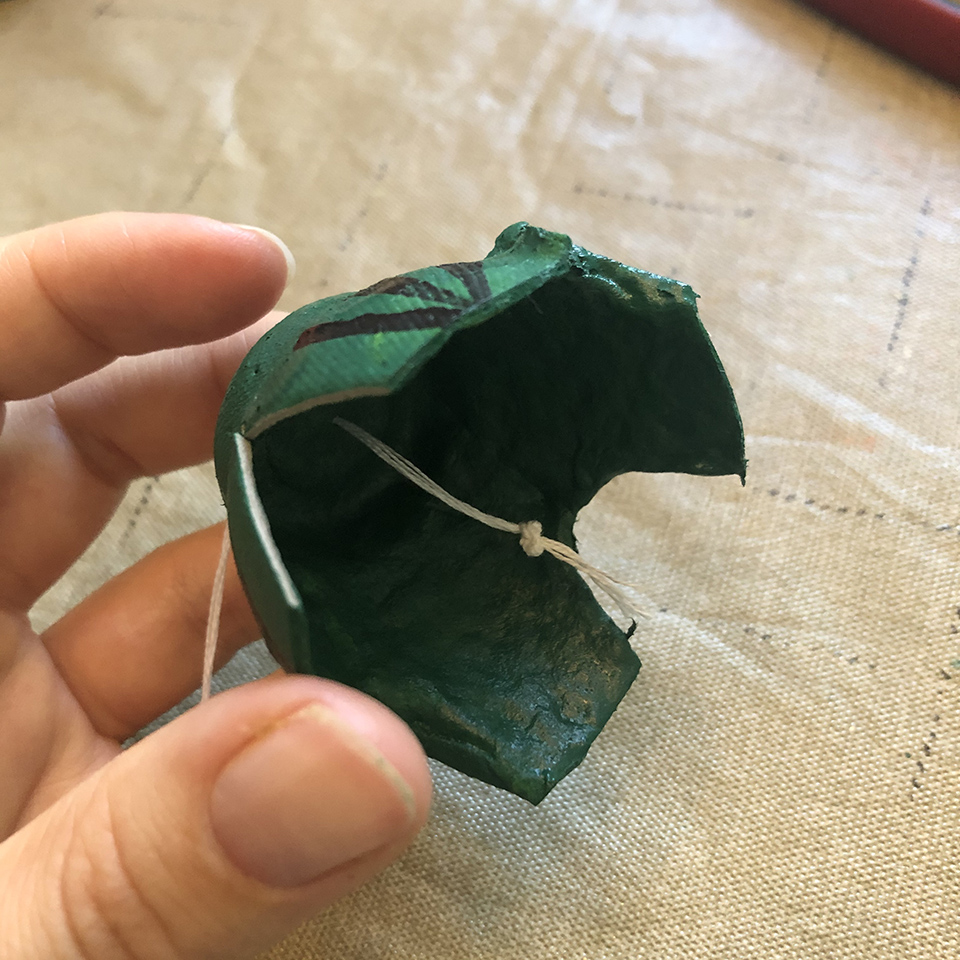
After installing the “fin,” I created a big knot about every 1 to 1 1/2 inches, to hold the subsequent egg cups (or scales). Be sure to create a loop at the top of each fish for hanging purposes. And, voila! Fishes!

Here are a few books we love, that would be a great companion to this craft:
Everything That You Need to Know about Our Fishy Friends
Ken Schultz’s Field Guide to Freshwater Fish

Jackie Baird Richardson is an interior designer, editor at The WON and avid junker. Watch for her design tips and occasional crafting ideas, bringing the outdoors indoors. View all posts by Jackie Richardson


