I am married to a neatnick, and lately, he has been reminding me that I need to clean my AR. Note: He, aka “the Bomb,” is a former rifle team commander for a top-notch team in the Royal Air Force. So, if he says my gun is dirty, it’s dirty. In fact, the Bomb recommends cleaning it at least every 1,000 rounds.

Sponsored by Springfield Armory
First of all, check to make sure the gun is unloaded. Make sure there is no ammo in your cleaning area – at all.
Assemble the tools you’ll need:
Take the Gun Apart
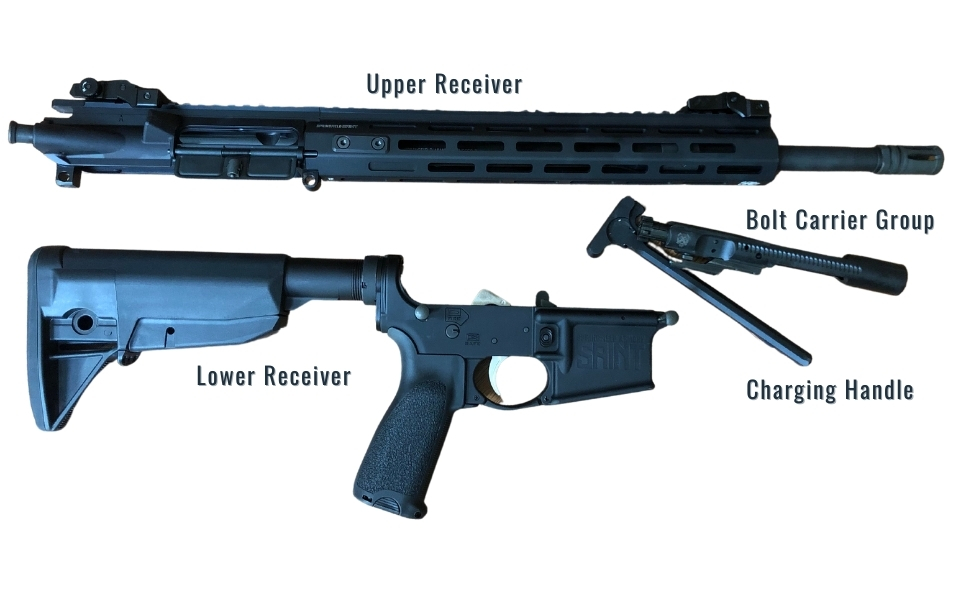
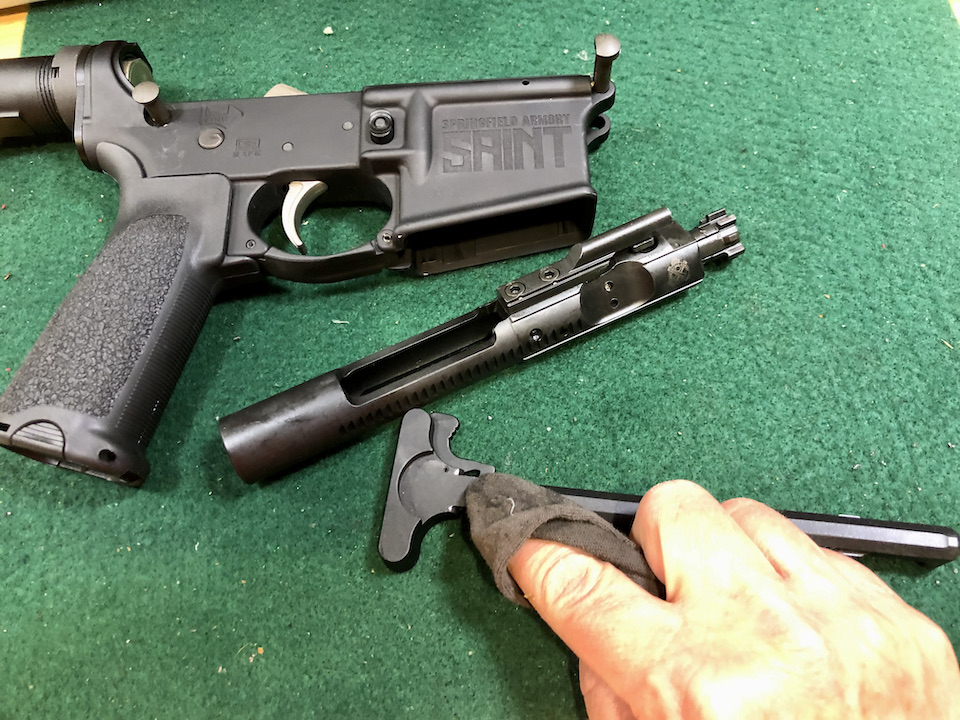
Follow the manufacturer’s instructions, found in your gun’s manual, and disassemble the gun into upper, lower, and BCG portions. Or, you can find a reputable video online and watch and learn.
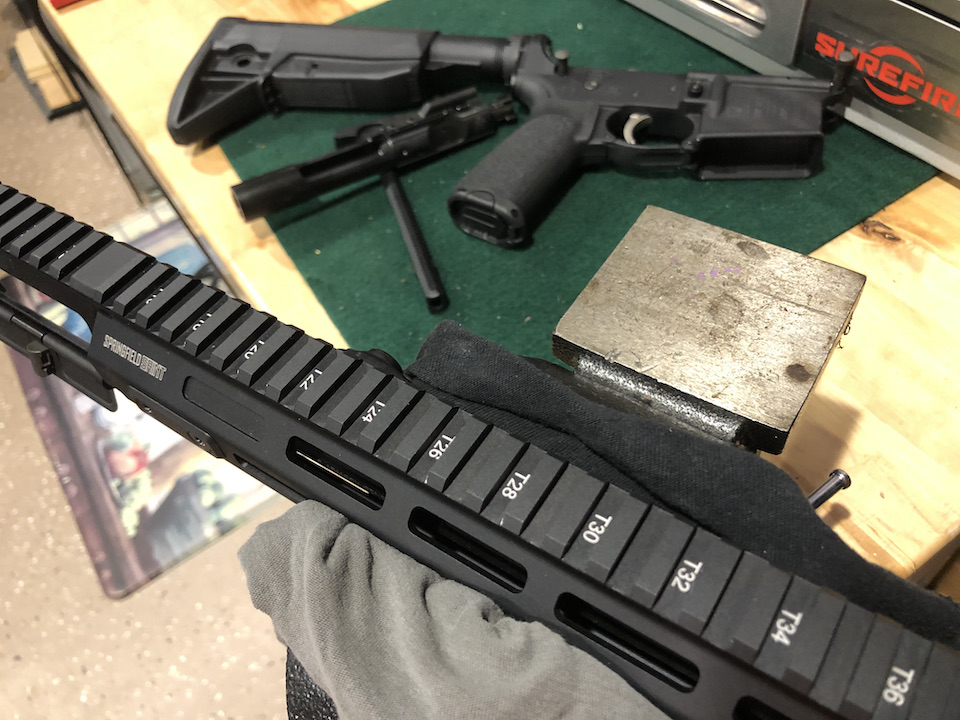
Put the upper of the gun into the vise and secure it.
Put the jag on your cleaning rod.
Attach a patch. (You may need to cut a patch down for it to fit into the bore for the first few times, until you have removed some of the powder fouling.)
Place solvent on the patch and run it down the bore of the gun.
Then, run a dry patch down the bore. Look at the patch to see how your cleaning is progressing – black deposits are powder fouling, blue-green are gilding metal from the projectiles. Your patches should be black at the beginning, and more blue-green as cleaning progresses.
Alternate: wet, dry, wet, dry, wet. Let the solvent set for a while in the bore. As the Bomb says, “Give chemistry a chance to work.” You’re removing the gunpowder from the bore with this process, before you apply the brush. This is a good time to clean the BCG (see below) while you’re waiting.

Use the chamber brush first. They are helpful when cleaning ARs. The shape of the chamber of an AR can make it difficult to clean. A chamber brush has been designed with bronze bristles that fit tightly into the chamber, while stainless steel tufts work on the lug recesses.
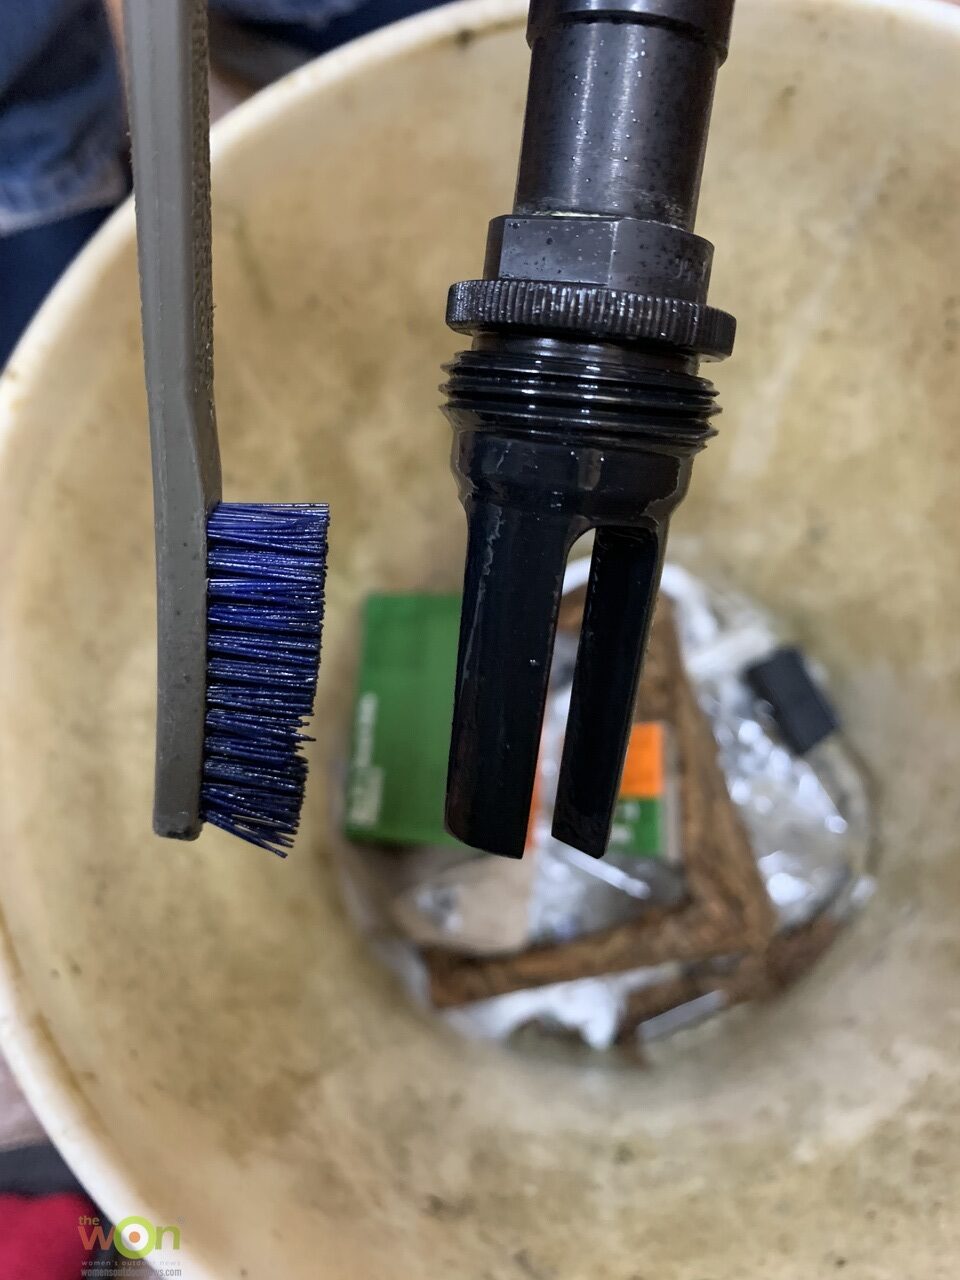
Take a gun brush and put some solvent on it. Scrub the flash hider and then, wipe it with a rag.
Now, use the bore brush in the barrel of the gun. Run it up and down, back and forth 10 times at least. Then, run another dry patch down the gun.
You will also have to re-wipe the chamber and muzzle device if any further grime comes out of the bore. Continue running dry and wet patches through the barrel until the last dry patch is clean.
Check your owner’s manual for details on how to take apart the BCG. As you disassemble it, lay the pieces out on a mat or cloth out of the way so you don’t lose them. In general, you’ll first pull the firing pin retaining pin out of the BCG; you might need a small screwdriver or forceps to grab the pin when you pull it, especially if it’s grimy. Next, you should be able to remove the firing pin by thumping the BCG, rear down, on the bench or table. Once the firing pin is out, pull the bolt forward as far as it will go in the BCG, then rotate the cam pin 90o and push the bolt back into the BCG. This allows you to grab the rectangular top of the cam pin (use the forceps if your fingers can’t get it) to pull it past the gas key and out of the bolt carrier. Lastly, grab the bolt and pull it forward, out of the bolt carrier.
Take a rag and wipe down all the pieces of the bolt carrier group to get carbon off. If you can clean the carbon off with a dry rag first, you’ll reduce the chances of that loose carbon turning into “mud” when adding solvent.
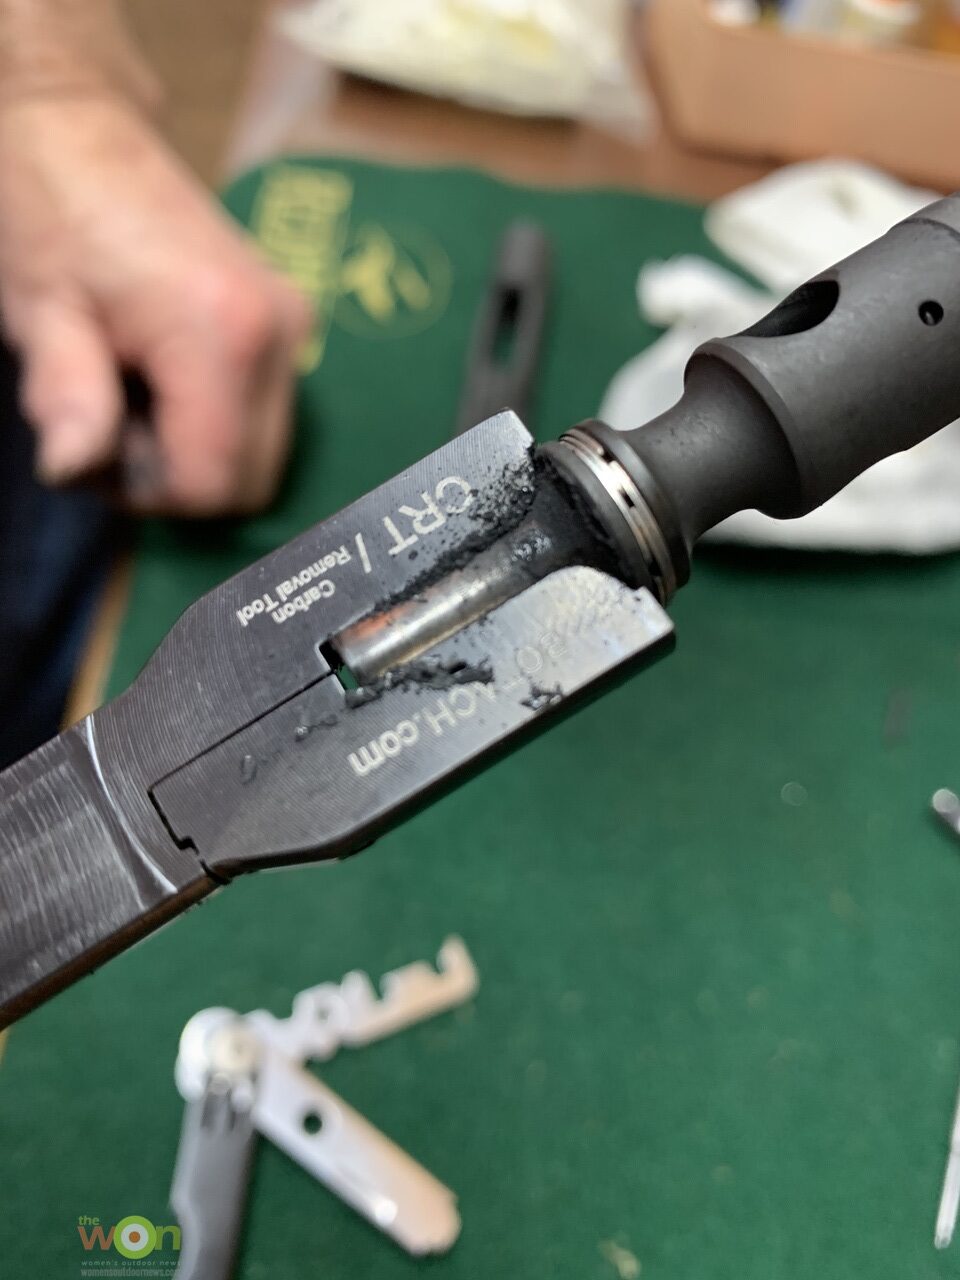
Next, with a special scraper tool designed for cleaning AR guns, you should now attack the carbon that is visible on pieces of the bolt carrier group. You’ll want to work on the tail of the bolt, and scrape off the visible carbon. Don’t worry about scratching the metal of the bolt, as the scraper is made specifically for scraping BCG parts.
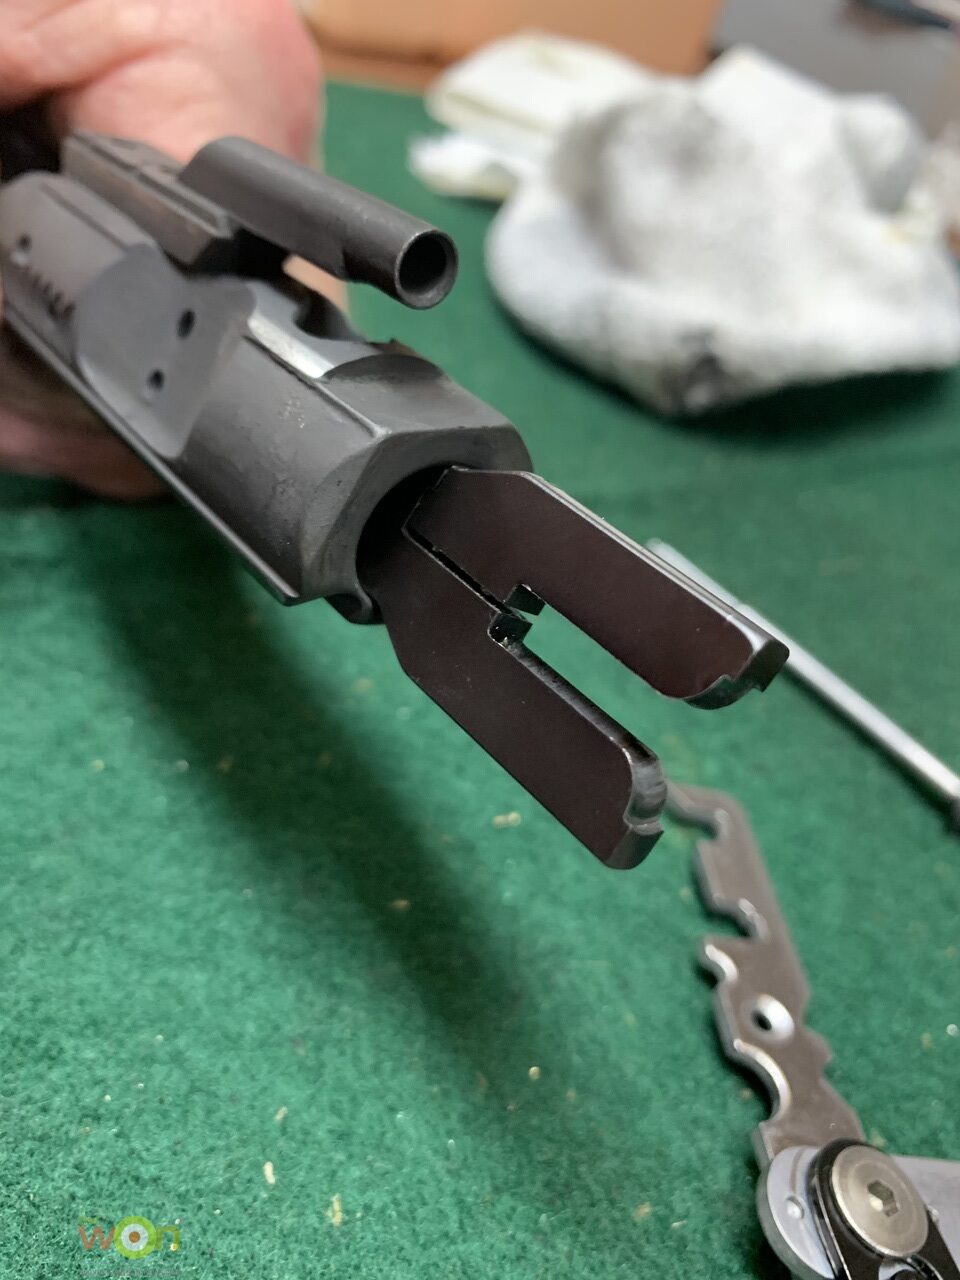
You may also scrape carbon off the firing pin with the tool. The Bomb uses two separate tools for various reasons, but the overall object is to remove carbon easily. In fact, he even inserted one of the tools into the bolt cavity of the bolt carrier and scraped out a bunch of carbon.
This is a great time to inspect your firearm, too. Look for loose pins, pins protruding too far out of components, cracked, bent or broken components.
Note: Within the “hot” parts of an AR gas system, where the hot gas from the bore is passed back through the gas tube, through the gas key, and into the bolt cavity, do not use any lubricant. The carbon, in small quantities, acts to lubricate these parts. For example, the gas rings on the bolt and the bolt cavity should not be lubricated. As long as it gets deposited on moving parts such as the gas rings, the amount of carbon is usually OK. The extra gets scraped off. That’s why the gas rings are shiny, but at the back end of the bolt cavity in the carrier where the rings don’t go, you’ll find carbon deposits.
Take a gas tube pipe cleaner, put a small amount of bore solvent on one end of it, and insert that end into the gas tube end that opens into the upper. Run the pipe cleaner all the way to the end of the gas tube; you may need to grab it with forceps to get it all the way in and then back out, again. Also, use an end of the pipe cleaner, with a little solvent, to clean the inside of the gas key where the gas tube resides when the BCG is in place in the upper. You don’t need to do this every time you clean an AR, but do it every few times you clean the gun.
Use the forceps, clamped on a folded solvent-soaked cleaning patch, to get into all the nooks and crannies in the upper and lower receivers and get the carbon and dirt out. Do the same with a dry patch to sop up the solvent afterwards. Then, wipe down the accessible innards of the lower receiver and the magazine well with a rag.
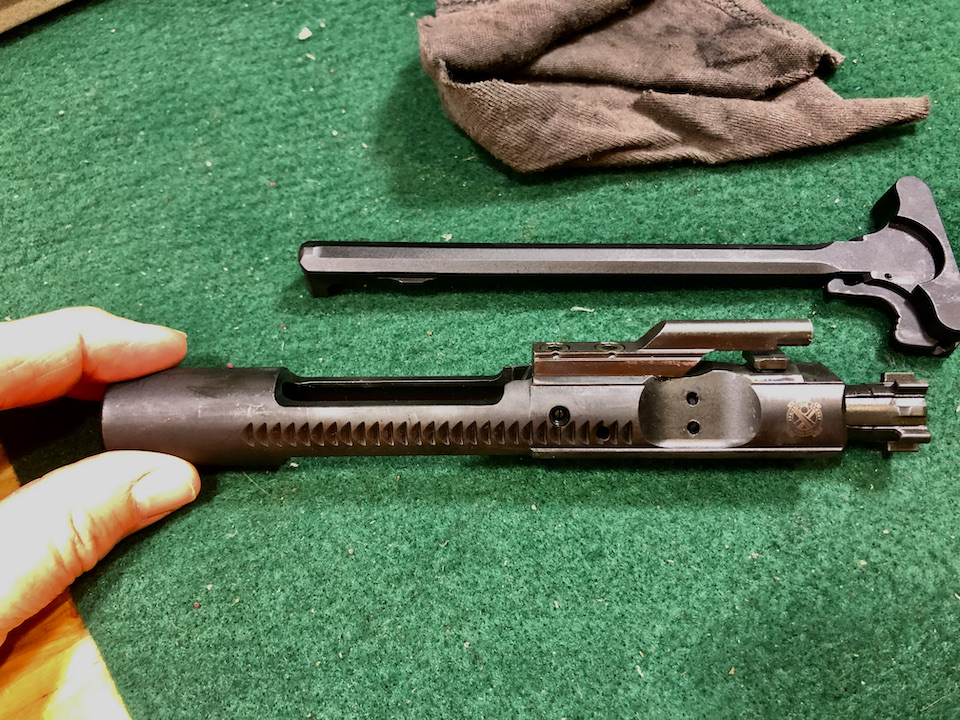
Take the brush again, add some solvent, and go after the charging handle with a brush and/or a rag. Wipe both sides and in the channel where the BCG gas key travels.
Consult your owner’s manual for where and how to lube your AR. At a minimum, put a bit of gun oil on the bolt lugs where they will rub the lug recesses in the gun’s chamber. If you get too much on, just wipe it off. Too much is not good. Also put a little lube on the cam pin (you’ll be able to see where the pin rubs the bolt carrier; lube those surfaces). Also, take a close look at the outside of the bolt carrier. There are four ribs running longitudinally on the front portion (the part that has the bolt cavity inside) – these are sliding surfaces on the bolt carrier that rub the inside of the upper receiver. They should be shiny from all the rubbing action, so put some lube on each of them.
Bottom line, if you see shiny surfaces where there’s been rubbing, unless they are part of the gas system, add oil.
Follow the assembly instructions in your manual. Generally, put the BCG back together by reversing the operations you did to take it apart. Orient the bolt by putting the ejector pin in the bolt face on the left, as you look down on the bolt carrier, before pushing the bolt back into the bolt carrier. The pin has to be on the opposite side of where the cartridge ejects. Then, with the bolt fully retracted into the bolt carrier, insert the cam pin into the bolt carrier. Pull the bolt forward as far as it will go, and rotate the cam pin 90o so that the hole in it lines up with where the firing pin will pass when it is inserted into the bolt carrier. Insert the firing pin into the BCG and push it as far forward as it will go. Lastly, insert the firing pin retaining pin into the side of the BCG. Then, thump the BCG vertically downward on the bench – if the firing pin falls out, you didn’t get it inserted into the BCG correctly.
Wipe down the entire gun with a clean, dry rag. Wipe down any magazines that you used. If need be, clean the magazines by taking them apart, too.
After using a brush, before you put it away spray it with carburetor cleaner or brake cleaner over a bucket, so the drips and grime go into a depository. Also, make sure you’re in a well-ventilated area, or outdoors, when using high VOC solvents such as these.
Consult your owner’s manual; don’t ever skip this step. Perform a function check on your firearm before you put it away. Make sure you have no ammo in the area. Do not use ammo for this check.
Store the unloaded gun in a safe, and make sure it’s not cocked.

Publisher/Editor Barbara Baird is a freelance writer in hunting, shooting and outdoor markets. Her bylines are found at several top hunting and shooting publications. She also is a travel writer, and you can follow her at https://www.ozarkian.com. View all posts by Barbara Baird